开发说明 & DEMO
支付管家 采用了 HTTP 协议提供各类接口,并且所有接口都是统一请求地址,方便商户简单、快速接入。本 API 包含 2 类接口,页面浏览器类和系统调用类。
- 页面浏览器类:需要从前端页面以 Form 表单的形式发起请求,浏览器会自动跳转至汇付的相关页面(一般是快捷收银台或签约页面),用户在该页面完成相关业务操作后再回跳到商户指定页面,页面方式返回的是标准的表单格式。
- 系统调用类:直接从服务端发起 HTTP 请求,API 会同步返回请求结果,返回的数据格式都是规范 JSON 格式。
参数和订单规范
参数规范
- 参数为可选项时,JSON 格式中可以不包含该参数,或该参数内容为空;
- 所有参数值不应该包含与 JSON 格式冲突的特殊字符,如括号,逗号,双引号,冒号等;
- 金额单位为元,精确到分,如:1200.00,359.14;
- 日期为定长 8 的字符串,格式为 YYYYMMDD,如 20140802;
订单规范
每个接口通过商户客户号、订单号、订单日期和交易类型来标识订单的唯一性;
由于网络的不稳定性等原因,相同订单的交易应答返回给商户订单系统时,有可能会出现以下两种情况:
1.同一订单请求多次,先支付完成的订单返回参数后通知到商户;
2.同一笔订单收到多次支付结果;
为此,本平台处理原则如下:
3.只要商户收到订单支付成功的应答,即使以后再次收到订单支付失败的应答,商户的订单系统也不会对此订单做任何处理。即保持该订单成功状态;
4.商户的订单系统对于某笔订单已经收到成功应答,有可能后续再次收到该笔订单的成功应答,此时商户只需要回应本平台收到成功即可;
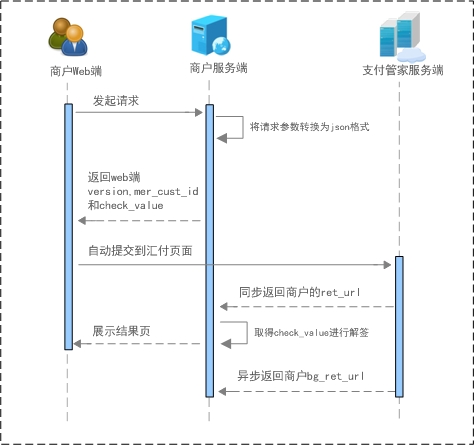
接口交互方式
本平台与商户之间有两种交互方式:
页面浏览器方式
商户以构造form表单的方式,通过持卡人的浏览器重定向到本平台,本平台完成交易后,将交易结果回送给商户,如页面版快捷支付接口采用这种方式。
后台返回方式
即后台POST请求方式,由于部分接口在某些情况下不能实时返回结果,接口会先同步返回一个已受理的返回码: “C00002-请求已受理”或者“C00001-请求处理中”;处理完成后,再把处理结果通过异步回调通知发送到传入参数bg_ret_url所指定的URL中。
接口调用规范
接口URL
| 生产 | 测试 |
|---|---|
| https://hfpay.cloudpnr.com/api/接口编号 | https://hfpay.testpnr.com/api/接口编号 |
注:接口编号详见每个接口的说明
后台版接口调用
请求参数规范
- 数据提交使用POST格式
调用接口过程

举例说明:假设接口参数为: version=10,mer_cust_id=6666000000011499,user_name=张三,bg_ret_url=https://xxx/xxx
第一步:将接口参数转换成 JSON 格式字符串
java
{“version”:”10”,”mer_cust_id”:”6666000000011499”,”user_name”:”张三”,”bg_ret_url”:”https://xxx/xxx”}
第二步:使用 pfx 证书和密码进行加密,生成 check_value
将第一步的JSON字符串,使用pfx证书和密码进行加密
java
SignResult signResult  = CFCASignature.signature(pfxFile, pfxFilePwd,params, "utf-8");
String check_value = signResult.getSign();
第三步:组装请求参数以POST方式发送
组装请求参数 version、mer_cust_id 和 check_value,以post方式请求支付管家接口,如下:
java
String postStr = " version=10&mer_cust_id=6666000000011499&check_value=第二步生成的加签串";
HttpRequest httpRequest = HttpRequest.post("https://hfpay.testpnr.com/api/接口编号").charset("UTF-8");
HttpResponse httpResponse = httpRequest.contentType("application/x-www-form-urlencoded").body(postStr).send();
注意:组装请求参数时 version 和 mer_cust_id 必须和第一步的接口参数中的 version 和 mer_cust_id 值保持一致。
接口应答接收规范
本平台同步和异步的返回参数都为json格式,商户收到应答后,需取出check_value解签。
解签过程如下:
举例说明(以交易状态查询接口返回的数据为例):
第四步:将返回报文转换成JSON格式,并取得check_value
假设返回数据如下:
{"check_value":"B170E66B00D344F8CEA68C3A84F0ED2207805147793F806CBD3D3E166B57F511ABEB7D5D7A725ECEFDC640FDC2F7102CD8D470CB0BE18A3B4ADE870689D7FCBD4CA55DD5C2E1D6BFC3F30514B0813D8E680708B44A1C1637780CA0D998EF22C10B7E4B8954F304F226BB50F091A60C939F7C4DB513261FC47667757550C7911E"}
第五步:解签 check_value,并取得返回参数
将第四步取得的check_value,使用cer证书文件和汇付的商户号(100001)进行解签,得到解签结果(VerifyResult),包含返回码(code),返回描述(message)和内容(content),返回码000代表验签成功,例如:
VerifyResult{code='000', message='验签成功',
content=[{"extension":"extension","trans\_stat":"","cmd\_id":"301","div\_detail":"","resp\_code":"301000","mer\_priv":"mer\_priv","trans\_amt":"","trans\_type":"01","order\_date":"20160801","order\_id":"600001","mer\_cust\_id":"6666000000024878","resp\_desc":"查询成功"}]};
取出content,得到返回参数的json字符串。
页面版接口调用
请求参数规范
- 数据使用页面表单提交
调用接口过程
举例说明:假设接口参数为: version=10,mer_cust_id=6666000000011499,user_name=张三,bg_ret_url=https://xxx/xxx
第一步:将接口参数转换成 JSON 格式字符串
java
{“version”:”10”,”mer_cust_id”:”6666000000011499”,”user_name”:”张三”,”bg_ret_url”:”https://xxx/xxx”}
第二步:使用 pfx 证书和密码进行加密,生成 check_value
将第一步的JSON字符串,使用pfx证书和密码进行加密
java
SignResult signResult  = CFCASignature.signature(pfxFile, pfxFilePwd,params, "utf-8");
String check_value = signResult.getSign();
第三步:页面表单提交
表单参数 version、mer_cust_id 和 check_value,页面加载后自动提交到支付管家接口,如下:
jsp
<%@ page language="java" contentType="text/html; charset=UTF-8"
pageEncoding="UTF-8"%>
<!DOCTYPE html>
<html>
<body>
<div class="main-con">
        <form action="${url}" method="post" id="autoForm" name="autoForm" OnSubmit="true">
        <table>
                <tr>
                  <td>商户客户号:</td>
                  <td >
                          <input type="text" name="mer_cust_id" id="mer_cust_id" value="${merCustId}">
                  </td>
                  <td>版本号:</td>
                  <td>
                          <input type="text" name="version" id="version" value="${version}">
                  </td>
                  <td>SIGN:</td>
                  <td>
                          <input type="text" name="check_value" id="check_value" value="${sign}">
                  </td>

                </tr>
        </table>
        </form>
</div>

</body>

<script>
        window.onload=function(){
                document.getElementById("autoForm").submit();
        }

</script>
</html>
注意:组装请求参数时 version 和 mer_cust_id 必须和第一步的接口参数中的 version 和 mer_cust_id 值保持一致。
接口应答接收规范
- 本平台同步和异步的返回参数都为json格式,商户收到应答后,需取出check_value解签。
举例说明(以交易状态查询接口返回的数据为例):
第一步:将返回报文转换成JSON格式,并取得check_value
假设返回数据如下:
{"check_value":"B170E66B00D344F8CEA68C3A84F0ED2207805147793F806CBD3D3E166B57F511ABEB7D5D7A725ECEFDC640FDC2F7102CD8D470CB0BE18A3B4ADE870689D7FCBD4CA55DD5C2E1D6BFC3F30514B0813D8E680708B44A1C1637780CA0D998EF22C10B7E4B8954F304F226BB50F091A60C939F7C4DB513261FC47667757550C7911E"}
第二步:解签 check_value,并取得返回参数
将第一步取得的check_value,使用cer证书文件和汇付的商户号(100001)进行解签,得到解签结果(VerifyResult),包含返回码(code),返回描述(message)和内容(content),返回码000代表验签成功,例如:
VerifyResult{code='000', message='验签成功',
content=[{"extension":"extension","trans\_stat":"","cmd\_id":"301","div\_detail":"","resp\_code":"301000","mer\_priv":"mer\_priv","trans\_amt":"","trans\_type":"01","order\_date":"20160801","order\_id":"600001","mer\_cust\_id":"6666000000024878","resp\_desc":"查询成功"}]};
取出content,得到返回参数的json字符串。
异步通知的应答规则
为了表示商户订单系统已经收到异步交易应答,商户必须在接收异步应答后输出一段特殊的字符串,组成规则为:固定字符串RECV_ORD_ID_加上交易应答中某一指定字段,一般为该交易的订单号order_id。
有些接口没有商户订单号,请查看具体的接口说明,说明中会指定,例如:开户接口的指定字段为order_id
例如:商户收到一笔订单号为990000034的交易应答,则应在该页面输出RECV_ORD_ID_990000034的字符串。本平台将搜索商户交易接收页面的前1024字节,只有搜索到该字符串,才能确认商户已经收到该笔订单的交易返回应答,否则,本平台认为商户未收到该笔订单的交易应答,进入重发队列
- 商户收到的应答无论时间先后,还是通过同步响应或者异步回调通知,都应被等同处理,后续的处理步骤列示如下:
| 同步响应 | 异步回调通知 | 商户网站的交易应答接收程序应采取的处理步骤 |
|---|---|---|
| 失败 | 失败 | 商户可以不作处理,订单支付失败 |
| 成功 | 成功 | 商户可以不作处理,订单支付成功 |
| 已受理 | 失败 | 需要修改商户订单系统数据库,订单支付失败 |
| 已受理 | 成功 | 需要修改商户订单系统数据库,订单支付成功 |
| 成功 | 失败 | 商户可以不作处理,订单支付成功 |
| 失败 | 成功 | 需要修改商户订单系统数据库,订单支付成功 |
注意小概率的特殊情处理:
支付和退款交易中,商户可能既收到失败通知,又收到成功通知,此时这笔交易状态以成功为准。
取现交易中,如果是T+1取现,商户以最后一次受到的通知结果为准。
返回的异常处理
异步回调通知,当请求访问商户bg_ret_url地址超时时,会重发3次,每次间隔5秒 。如若由于网络或商户系统异常导致返回均无法接收,商户可对接交易状态查询接口,查询交易结果。
API 特点
- 为保证接口的安全性,每笔交易都通过 CFCA 进行签名,篡改签名将导致验签失败,交易无法正常进行;
- 商户可以动态地将每笔交易的返回地址指向不同的交易网站,适合于多网站和多应用的商户;
- 商户在接口中可以自定义域,本平台返回时,会将该域原样返回,供商户实现特定的功能;
- 本平台通过后台方式向商户发送交易结果,通过分析商户的返回页面,可以准确地知道商户是否收到交易应答结果,从而对发送失败的交易采取自动重发;
结果返回机制
接口中提供“商户前台应答地址ret_url”,“商户后台应答地址bg_ret_url”,向用户反馈接口处理结果
- 商户前台应答地址ret_url,商户通过此参数传入商户侧的页面展示页面,汇付交易受理完跳转到该地址展示受理结果。
- 商户后台应答地址bg_ret_url,对于交易异步产生终态结果的,商户通过此参数传入后台结果回调地址,汇付在交易处理完毕后通过调用该地址通知商户交易的终态结果。
异步回调接收规范
- 本平台所有异步接口都提供异步回调通知,当请求HTTP或HTTPS超时,该交易即进入重发队列,本平台会尝试将该交易应答重发给商户,重试3次,每次间隔5秒。如若由于网络或商户系统异常导致返回均无法接收,商户可调用交易状态查询接口,或线下请求重发。
- 我司本系统生产环境出口IP为:106.14.51.79,203.107.45.37,139.224.111.237,180.167.97.210,116.228.159.35,112.64.184.162,27.115.110.2,117.144.179.194,若贵司系统对外网访问有IP限制,烦请将该IP加入白名单,以确保异步回调能收到。
加解签 & DEMO
本 API 对商户与汇付之间请求数据采用的是 CFCA 证书加解签方式。目前支持JAVA、PHP、C#、Python四种语言。
JAVA 代码示例及完整DEMO
加签示例
java
private static String sign(String valueObj) {
       // 加签用 pfx 文件,请换成商户自己导出的证书
       String pfxFile = "/app/etc/product/888888-NEW.pfx";
       // 加签用密码,导出 pfx 证书时的密码
       String pfxFilePwd = "888888";
       // 加签
       SignResult signResult  = CFCASignature.signature(pfxFile, pfxFilePwd,valueObj, "utf-8");
       if ("000".equals(signResult.getCode())) {
           return signResult.getSign();
       } else {
           return "加签失败";
       }
    }
验签示例
java
public static String parseResult(String responseJson) throws Exception {
    JSONObject jsonObject = JSON.parseObject(responseJson);
    String sign = jsonObject.getString("check_value");
            // 解签用的证书,请换成商户自己下载的证书
    String cerFile = "/app/etc/product/CFCA_ACS_TEST_OCA31.cer";

    VerifyResult verifyResult = CFCASignature.verifyMerSign("100001", sign, "utf-8", cerFile);

    if ("000".equals(verifyResult.getCode())) {
        String content = new String(verifyResult.getContent(), Charset.forName("utf-8"));
        return content;
    } else {
        return "验签失败";
    }
}
JAVA版完整DEMO说明
DEMO 提供了大部分接口调用示例。使用 DEMO 之前商户需要申请 CFCA 加解签证(商户在汇付开户后,会有邮件通知下载)
硬件需求
服务可以部署在 linux 和 windows 等具有 JVM 环境的服务容器内,比如 jboss,tomcat 等(暂提供 jboss)。安装 JDK1.7 并配置好 JDK 的环境变量。
部署服务
将证书文件放到服务器 $path 目录下,上传 war 包到服务器。
上传测试证书888888-NEW.pfx,CFCA_ACS_TEST_OCA31.cer,到/app/etc/目录下。
PHP 代码示例( Linux 版)
Demo 运行
一、安装对应版本的PHP
二、安装运行时环境(glibc库等)
三、修改PHP的配置文件php.ini
- 修改php.ini,使php允许加载扩展,并将当前扩展添加到其扩展列表中
- enable_dl = On
- extension=libSADKExtension.so
四、在DemoRSA目录下替换证书和cer文件
- pfx为私钥文件请妥善保管不要泄露给他人,cer文件为颁发者公钥,用来验证汇付公钥
五、配置 cfcalog.conf cfca日志文件
六、通过命令行终端运行Demo文件
- php huifuCFCALinuxDemo.php
PHP demo运行常见问题
- Message:cfca_Initialize error:24578,请检查下证书权限、日志权限,证书路径是否正确
- Message:cfca_signData_PKCS7Attached error:24578,请检查下证书权限、日志权限,证书路径是否正确
- 具体错误可通过cfca.log日志中判断排查问题
- 注:cfca_verifyCertificate 参数 $nCertVerifyFlag 是数值类型的
| Msg PKCS7-attached Sign | 为使用 pfx 证书加签 |
| PKCS7-attached-Verify | 为验证汇付的签名 |
| cfca_verifyCertificate | 为验证证书链合法性 |
| cfca_getCertificateInfo | 为获取证书信息(非必要) |
php
<?php

class HuifuCFCA
{
        private $apiUrl                 = 'https://hfpay.testpnr.com/api/acou/cash01';                       //取现接口地址,此处使用的是联调环境地址
        private $strSignAlg             = 'RSA';                     //RSA证书类型
        private $strPfxPassword         = '888888';                 //导出时设置的密码
        private $strHashAlg             = 'SHA-256';                //加签算法
        private $strPfxFilePath        = './RSA/AS0381.pfx';      //汇付下发的证书,此处换成商户自己的证书 .pfx 格式 加签使用
        private $strTrustedCACertFilePath = './RSA/CFCA_ACS_TEST_OCA31.cer|./RSA/CFCA_ACS_TEST_CA.cer'; //汇付下发的.cer证书 ,需要一对证书 解签使用
        private $strLogCofigFilePath  = './cfcalog.conf';          //CFCA log 目录

        public function __construct()
        {
                $this->getCFCAInitialize();     //CFCA工具初始化
        }

        /**
         * CFCA工具初始化
         */
        private function getCFCAInitialize()
        {
                $nResult = cfca_initialize($this->strLogCofigFilePath);
                if (0 != $nResult) {
                        //记录log
                        echo new Exception("\n cfca_Initialize error:".$nResult."\n");
                }
        }

        /**
         * 调用接口  此处是接口请求
         *
         * @return string
         */
        public function apiRequest(){
                //请求参数,依据商户自己的参数为准
                $requestParam['version'] = '10';
                $requestParam['mer_cust_id'] = '6666000000002619';
                $requestParam['user_cust_id'] = '6666000000002619';
                $requestParam['order_date'] = '20180918';
                $requestParam['order_id'] = '201809189000001';
                $requestParam['trans_amt'] = '1.00';
                $requestParam['cash_type'] = 'T1';
                $requestParam['bg_ret_url'] = "https://www.baidu.com";
                $requestParam['dev_info_json'] = "{'ipAddr':'10.99.195.11','devType':'1'}";

                //加签
                $strSignSourceData = json_encode($requestParam);
                $cfcaSign = $this->CFCASignature($strSignSourceData);

                //接口请求参数
                $param = [
                        'requestData'  => [
                                'mer_cust_id' => $requestParam['mer_cust_id'],
                                'version' => $requestParam['version'],
                                'check_value' => $cfcaSign,
                        ],
                        'headers' => ['Content-type' => 'application/x-www-form-urlencoded;charset=UTF-8']
                ];
                $requestData = $this->requestData($param);
                $checkValue = json_decode($requestData['body'],1)['check_value'];

                //验证接口返回的签名数据
                $sourceData = $this->getCFCASignSourceData($checkValue);
                $SignCertContent = !empty($sourceData['strMsgP7AttachedSignCertContent']) ? $sourceData['strMsgP7AttachedSignCertContent'] : '';

                //验证返回数据的CFCA证书有效性
                $verifyCertificat = $this->verifyCertificat($SignCertContent);
                $signSourceData = '';
                if(!empty($sourceData['strMsgP7AttachedSource']) && $verifyCertificat){  //校验证书有效性
                        $signSourceData =  $sourceData['strMsgP7AttachedSource'];
                }

                return $signSourceData;
        }

        /**
         * CFCA 加签方法
         *
         * @param $strSignSourceData  base64 encode 加签原串
         * @return string  base64 encode 加签串
         */
        private function CFCASignature($strSignSourceData){
                $strMsgPKCS7AttachedSignature = '';//加签生成串 ,输出变量,无需传值

                try{
                        //调用加签方法
                        $nResult = cfca_signData_PKCS7Attached($this->strSignAlg, $strSignSourceData,
                                $this->strPfxFilePath, $this->strPfxPassword, $this->strHashAlg,$strMsgPKCS7AttachedSignature);

                        //加签方法异常判断及记录
                        if (0 != $nResult) {
                                //记录log
                                echo new Exception("\n cfca_signData_PKCS7Attached error:".$nResult."\n");
                        }

                }catch (Exception $e){
                        throw new Exception("\n cfca_verifyCertificate error:".$e."\n");
                }

                return base64_encode($strMsgPKCS7AttachedSignature);
        }

        /**
         * CFCA 验证签名数据
         *
         * @param $signature
         * @return array
         */
        private function getCFCASignSourceData($signature){
                $strMsgP7AttachedSignCertContent = '';  //PKCS#7 中的签名证书  输出变量,无需传值
                $strMsgP7AttachedSource = '';   //签名原文字符串  输出变量,无需传值

                try{
                        //调用验证签名数据方法
                        $nResult = cfca_verifyDataSignature_PKCS7Attached($this->strSignAlg, base64_decode($signature),
                                $strMsgP7AttachedSignCertContent,$strMsgP7AttachedSource);

                        //验证签名方法异常判断及记录
                        if (0 != $nResult) {
                                //记录log
                                echo new Exception("cfca_verifyDataSignature error:".$nResult);
                        }

                }catch (Exception $e){
                        //记录log
                        throw new Exception("cfca_verifyDataSignature_PKCS7Attached error:".$e);
                }

                return array(
                        'strMsgP7AttachedSource' => $strMsgP7AttachedSource,
                        'strMsgP7AttachedSignCertContent' => $strMsgP7AttachedSignCertContent,
                );
        }

        /**
         * CFCA 证书有效性验证
         *
         * @param $strMsgP7AttachedSignCertContent PKCS#7 中的签名证书 base64
         * @return int
         */
        private function verifyCertificat($strMsgP7AttachedSignCertContent = ''){
                $nCertVerifyFlag = '4'; //验证证书链完整性
                $strTrustedCACertFilePath = $this->strTrustedCACertFilePath;
                $isVerify = false;

                try{
                        //调用验证方法
                        $nResult = cfca_verifyCertificate($strMsgP7AttachedSignCertContent, $nCertVerifyFlag, $strTrustedCACertFilePath,"");
                        if (0 == $nResult) {  // 0 为验证通过 ,其他验证失败
                                $isVerify = true;
                        }else{
                                //记录log
                                echo new Exception("cfca_verifyCertificate error:".$nResult);
                        }

                }catch (Exception $e){
                        //记录log
                        throw new Exception("cfca_verifyCertificate error:".$e);
                }

                return $isVerify;
        }


        /**
         * 请求接口返回数据
         * @param $param
         * @return array
         */
        private function requestData($param)
        {
                try{
                        // 请求接口所以参数初始化
                        $data = [
                                'url'         => $this->apiUrl,          // 接口 url
                                'requestData' => $param['requestData'], // 请求接口参数
                                'headers'     =>$param['headers']
                        ];

                        $res = $this->httpPostRequest($data['url'],$data['headers'],$data['requestData']);

                } catch (\Exception $e) {
                        //记录log
                        throw new Exception("api requestData error :".$e);
                }

                return [
                        'status' => $res['info']['http_code'],
                        'body' => $res['body']
                ];
        }

        /**
         * curl post 请求方法
         *
         * @param string $url
         * @param array $header
         * @param array $requestData
         * @return array
         */
        private function httpPostRequest($url = '',$header = array(),$requestData = array()){
                $curl = curl_init();
                curl_setopt ( $curl, CURLOPT_HTTPHEADER,$header);
                curl_setopt($curl, CURLOPT_URL, $url);
                curl_setopt($curl, CURLOPT_RETURNTRANSFER, true);
                curl_setopt($curl, CURLOPT_POST, true);
                curl_setopt($curl, CURLOPT_POSTFIELDS,http_build_query($requestData));
                $res = curl_exec($curl);
                $info = curl_getinfo($curl);
                $error = curl_error($curl);
                curl_close($curl);

                return [
                        'body' => $res,
                        'info' => $info,
                        'error' => $error,
                ];
        }

        /**
         *CFCA工具结束
         */
        public function __destruct()
        {
                cfca_uninitialize();
        }

}
//调用
$demoObj = new HuifuCFCA();
$data = $demoObj->apiRequest();

print_r('<pre/>');
print_r($data);
PHP 代码示例( Windows 版)
Demo 运行
环境要求:WinServer2008 64bit、 WinServer2012 64bit 1. 配置php.ini php -i|findstr ini ,找到php.ini所在路径 将重命名后的 php.ini 文件内的“; extension_dir = “ext””行,修改为 “extension_dir = “./ext””。然后,在 php.ini 文件末尾,添加以下两行内容: [COM_DOT_NET] extension=php_com_dotnet.dll
2. 注册com组件 64位下执行 regsvr32 CryptoKit.Standard.x64.dll 32位下执行 regsvr32 CryptoKit.Standard.x86.dll
3. 在DemoRSA目录下替换证书和cer文件 pfx为私钥文件请妥善保管不要泄露给他人 cer文件为颁发者公钥,用来验证汇付公钥
4. 在Demo目录下执行 php huifuCFCAWindowsDemo.php
| SignData_PKCS7Attached | 为使用 pfx 证书加签 |
| VerifyDataSignature_PKCS7Attached | 为验证汇付的签名 |
| VerifyCertificate | 为验证证书链合法性 |
| GetCertificateInfo | 为获取证书信息(非必要) |
php
<?php

class HuifuCFCA
{
        private $apiUrl                 = 'https://hfpay.testpnr.com/api/acou/cash01';                       //取现接口地址,此处使用的是联调环境地址
        private $strSignAlg             = 'RSA';                     //RSA证书类型
        private $strPfxPassword         = '888888';                 //导出时设置的密码
        private $strHashAlg             = 'SHA-256';                //加签算法
        private $strPfxFilePath        = './RSA/AS0381.pfx';       //汇付天下发的证书,此处换成商户自己的证书  此处换成商户自己的证书 .pfx 格式 加签使用
        private $strTrustedCACertFilePath = './RSA/CFCA_ACS_TEST_OCA31.cer|./RSA/CFCA_ACS_TEST_CA.cer'; //汇付下发的.cer证书 ,需要一对证书 验签使用
        private $cryptoAgentServerObj = '';                         //CFCA obj

        public function __construct()
        {
                // Create the object of COM by its ProgID
                // If your php is compiled with x64, you need to use CryptoKit.standard.x64.dll, its ProgID is:CryptoKit.CryptoAgent.Server.Standard.x64.1
                // If your php is compiled with x86, you need to use CryptoKit.standard.x86.dll, its ProgID is:CryptoKit.CryptoAgent.Server.Standard.x86.1
                // Change next line according to your php
                //注册windows com 服务,依据自己PHP编译版本选择对应参数,此处使用的是32位编译版本的PHP
                $this->cryptoAgentServerObj = new \COM("CryptoKit.CryptoAgent.Server.Standard.x86.1", NULL, CP_UTF8);
        }

        /**
         * 调用接口  此处是接口请求
         *
         * @return string
         */
        public function apiRequest(){
                //请求参数,依据商户自己的参数为准
                $requestParam['version'] = '10';
                $requestParam['mer_cust_id'] = '6666000000002619';
                $requestParam['user_cust_id'] = '6666000000002619';
                $requestParam['order_date'] = '20180918';
                $requestParam['order_id'] = '201809189000001';
                $requestParam['trans_amt'] = '1.00';
                $requestParam['cash_type'] = 'T1';
                $requestParam['bg_ret_url'] = "https://www.baidu.com";
                $requestParam['dev_info_json'] = "{'ipAddr':'10.99.195.11','devType':'1'}";

                //加签
                $strSignSourceData = json_encode($requestParam);
                $cfcaSign = $this->CFCASignature($strSignSourceData);

                //取现接口请求
                $param = [
                        'requestData'  => [
                                'mer_cust_id' => $requestParam['mer_cust_id'],
                                'version' => $requestParam['version'],
                                'check_value' => $cfcaSign,
                        ],
                        'headers' => ['Content-type' => 'application/x-www-form-urlencoded;charset=UTF-8']
                ];
                $requestData = $this->requestData($param);
                $checkValue = json_decode($requestData['body'],1)['check_value'];

                //验证接口返回的签名数据
                $strBase64CertContent = $this->verifyDataSignature($checkValue);

                //验证返回数据的CFCA证书有效性
                $verifyCertificat = $this->verifyCertificat($strBase64CertContent);

                //获取解签数据
                $signSourceData = '';
                if($verifyCertificat){  //校验证书有效性
                        $signSourceData = $this->getCFCASignSourceData($checkValue);
                }

                return $signSourceData;
        }

        /**
         * cfca 加签方法
         *
         * @param $strSignSourceData 待签名字符串
         * @return string
         */
        private function CFCASignature($strSignSourceData){
                $strMsgPKCS7AttachedSignature = '';

                try{
                        $strMsgPKCS7AttachedSignature = $this->cryptoAgentServerObj->SignData_PKCS7Attached($this->strSignAlg, $strSignSourceData,
                                $this->strPfxFilePath, $this->strPfxPassword, $this->strHashAlg);

                }catch (Exception $e){
                        $strErrorMsg = $this->cryptoAgentServerObj->GetLastErrorDesc();

                        return  $strErrorMsg;
                }

                return base64_encode($strMsgPKCS7AttachedSignature);
        }

        /**
         * CFCA 验证签名数据
         * @param $signature Base64编码的签名
         * @return string
         */
        private function verifyDataSignature($signature){
                $strBase64CertContent = "";

                try{
                        $strBase64CertContent = $this->cryptoAgentServerObj->VerifyDataSignature_PKCS7Attached($this->strSignAlg,base64_decode($signature));

                }catch (Exception $e){
                        $strErrorMsg = $this->cryptoAgentServerObj->GetLastErrorDesc();
                        //记录log
                        throw new Exception("\n verifyDataSignature error:".$strErrorMsg."\n");
                }

                return $strBase64CertContent;
        }

        /**
         * CFCA 解签获取签名数据
         * @param $signature
         * @return string
         */
        private function getCFCASignSourceData($signature){
                $strMsgP7AttachedSource = '';

                try{
                        $strMsgP7AttachedSource = $this->cryptoAgentServerObj->GetSignSourceData(base64_decode($signature));

                }catch (Exception $e){
                        $strErrorMsg = $this->cryptoAgentServerObj->GetLastErrorDesc();

                        return  $strErrorMsg;
                }

                return $strMsgP7AttachedSource;
        }

        /**
         * CFCA 证书有效性验证
         *
         * @param $strBase64CertContent 签名证书内容 base64
         * @return bool
         */
        private function verifyCertificat($strBase64CertContent = ''){
                $nCertVerifyFlag = '4'; //验证证书链完整性
                $strTrustedCACertFilePath = $this->strTrustedCACertFilePath;

                try{
                        //调用验证方法
                        $nResult = $this->cryptoAgentServerObj->VerifyCertificate($strBase64CertContent, $nCertVerifyFlag, $strTrustedCACertFilePath,"");

                        if (!$nResult) {  // true 为验证通过 ,其他验证失败
                                //记录log
                                echo new Exception("verifyCertificat error:".$nResult);
                        }

                }catch (Exception $e){
                        //记录log
                        throw new Exception("verifyCertificat error:".$e);
                }

                return $nResult;
        }

        /**
         * 请求接口返回数据
         * @param $param
         * @return array
         */
        private function requestData($param)
        {
                try{
                        // 请求接口所以参数初始化
                        $data = [
                                'url'         => $this->apiUrl,          // 接口 url
                                'requestData' => $param['requestData'], // 请求接口参数
                                'headers'     =>$param['headers']
                        ];

                        $res = $this->httpPostRequest($data['url'],$data['headers'],$data['requestData']);

                } catch (\Exception $e) {
                        //记录log
                        throw new Exception("api requestData error :".$e);
                }

                return [
                        'status' => $res['info']['http_code'],
                        'body' => $res['body']
                ];
        }

        /**
         * curl post 请求方法
         *
         * @param string $url
         * @param array $header
         * @param array $requestData
         * @return array
         */
        private function httpPostRequest($url = '',$header = array(),$requestData = array()){
                $curl = curl_init();
                curl_setopt ( $curl, CURLOPT_HTTPHEADER,$header);
                curl_setopt($curl, CURLOPT_URL, $url);
                curl_setopt($curl, CURLOPT_RETURNTRANSFER, true);
                curl_setopt($curl, CURLOPT_POST, true);
                curl_setopt($curl, CURLOPT_POSTFIELDS,http_build_query($requestData));
                $res = curl_exec($curl);
                $info = curl_getinfo($curl);
                $error = curl_error($curl);
                curl_close($curl);

                return [
                        'body' => $res,
                        'info' => $info,
                        'error' => $error,
                ];
        }

}
//调用接口
$demoObj = new HuifuCFCA();
$data = $demoObj->apiRequest();

print_r('<pre/>');
print_r($data);
Python 代码示例
Demo 运行环境要求:Linux 64bit
1、Python要求:Python2.7/Python3.x
2、使用 pip 安装 cfcasign, 安装命令: pip install cfcasign-0.0.1.tar.gz
3、参考demo完成cfca加解签
python
 """CFCA Python SDK version Demo"""

 from cfcasign import CFCASignature

 import os

 if __name__ == '__main__':
 cfca_signature = CFCASignature()
  # 加签
  _return_code, sign = cfca_signature.get_sign(algorithm='rsa',
                                               source_data=__doc__,
                                               pfx_file_path=os.path.join('rsasigncert.pfx'),
                                               pfx_password='111111',
                                               hash_alg='sha-256'
                                          )
  print("sign return code: {0}".format(_return_code))
  print("sign value: {0}".format(sign))

  # 验签
  signature_base64 = b"TUlJR0pRWUpLb1pJaHZjTkFRY0NvSUlHRmpDQ0JoSUNBUUV4RHpBTkJnbGdoa2dCWlFNRUFnRUZBREFYQmdrcWhraUc5dzBCQndHZ0NnUUlWR1Z6ZEVSaGRHR2dnZ1JNTUlJRVNEQ0NBekNnQXdJQkFnSUZRQUtaZDNVd0RRWUpLb1pJaHZjTkFRRUxCUUF3WFRFTE1Ba0dBMVVFQmhNQ1EwNHhNREF1QmdOVkJBb1RKME5vYVc1aElFWnBibUZ1WTJsaGJDQkRaWEowYVdacFkyRjBhVzl1SUVGMWRHaHZjbWwwZVRFY01Cb0dBMVVFQXhNVFEwWkRRU0JCUTFNZ1ZFVlRWQ0JQUTBFek1UQWVGdzB4T0RBeE1UVXdORFE1TkRCYUZ3MHlNekF4TVRVd05EUTVOREJhTUhFeEN6QUpCZ05WQkFZVEFrTk9NUlV3RXdZRFZRUUtFd3hEUmtOQklGUkZVMVFnUTBFeEVUQVBCZ05WQkFzVENFeHZZMkZzSUZKQk1Sa3dGd1lEVlFRTEV4QlBjbWRoYm1sNllYUnBiMjVoYkMweE1SMHdHd1lEVlFRREZCUXdOVEZBUVZNd016Z3hRRTR4TVRFeE16QkFNVENDQVNJd0RRWUpLb1pJaHZjTkFRRUJCUUFEZ2dFUEFEQ0NBUW9DZ2dFQkFOMlN3T0MyeDUwQkRMSXpHWGNJOFlUQ0VMTEVsTG5VUFNBZndNQi9zYXN0eWZ1WjFLQnQ5YlFSOEhhTkRVM0I4S0o2RVdEYTlYYUcyMStmT0hvViszOW1vV3E2Vm1jL2pHRDJMaUdneGJCWWgyUkkwakZFODdZQjIvZE1iT3JyT3E5SjViVHc5bVQ0L3BCbHF1Q0RLdlkwclpUdlVVb3loRW5TcWlaQ0lFY1hBall3T2l0UlovS0tkbU9pTUhrOXJ3ZTJhekhjZ1R5TGJiMzVDL2dIUjViZWRCVWNPbEhuUnh1N2pNSlgwbWxEaEFXOUo4c3E2ZHJ0eTVIRkxoTTR0VjVuUW1ES1JteEo5Ylk0WmRuaXpvdlg0NTJmNFJOYUs2TE4vQ1RYUWcvSkpmYzMxM3k3YitQSFJjSHFINlh6dnBXRHJhczNhbEtRMlBqVlhwQnRwcThDQXdFQUFhT0IrakNCOXpBL0JnZ3JCZ0VGQlFjQkFRUXpNREV3THdZSUt3WUJCUVVITUFHR0kyaDBkSEE2THk5dlkzTndkR1Z6ZEM1alptTmhMbU52YlM1amJqbzRNQzl2WTNOd01COEdBMVVkSXdRWU1CYUFGSm85dEs1bFdQdk9XZ1Y0SnFCdEt3U0d1c2JzTUF3R0ExVWRFd0VCL3dRQ01BQXdOd1lEVlIwZkJEQXdMakFzb0NxZ0tJWW1hSFIwY0Rvdkx6SXhNQzQzTkM0ME1pNHpMMDlEUVRNeEwxSlRRUzlqY213eU9TNWpjbXd3RGdZRFZSMFBBUUgvQkFRREFnYkFNQjBHQTFVZERnUVdCQlR0Szk2V2w4aTlDaThaV3ZEeUpZSWpuaStCMWpBZEJnTlZIU1VFRmpBVUJnZ3JCZ0VGQlFjREFnWUlLd1lCQlFVSEF3UXdEUVlKS29aSWh2Y05BUUVMQlFBRGdnRUJBRGE2cVpuS1Ryak9HSWpoWXdMelY2N3VqMFJYbDMzcXNsNFpMSVY1Ym1BQ0dRWUVPSlpuaDZLcjhHNnI1TXBZK0k0S2ptNCtUNXlrSmNlRHoyMGJNa0lDMnlXREpoQW1kWjIrTEdXcE9wdnlka1hVaE5QNzZ5aFc2RzdSdGVUZllDSSsrYmhTdUd1TWRGSUNPN3VOSDN4d0lUUGhabjliWVR4dGxVbWh3MnU5U0ZXOG5oQVphdHd0VExJVUxXYmcwZ2lXbU5tcXNENVhiNG45U2xRVk9tTDBDd3o0Zkd3d2FoVG9Tait5aU82QmhwbFlyeWJuNHc2cXhtU0htMXhOYkJqSW05djYrV2EwcHFRbldGZ3VwZCtFMGYxYVphSmxYQi9wWkMyNzBGZEZyZ0hYdTBBNEFOZ0lTZjNJYU5RNk1mbUFDTm5BRGpSQVd2dFVZWTFCaEhVeGdnR1JNSUlCalFJQkFUQm1NRjB4Q3pBSkJnTlZCQVlUQWtOT01UQXdMZ1lEVlFRS0V5ZERhR2x1WVNCR2FXNWhibU5wWVd3Z1EyVnlkR2xtYVdOaGRHbHZiaUJCZFhSb2IzSnBkSGt4SERBYUJnTlZCQU1URTBOR1EwRWdRVU5USUZSRlUxUWdUME5CTXpFQ0JVQUNtWGQxTUEwR0NXQ0dTQUZsQXdRQ0FRVUFNQTBHQ1NxR1NJYjNEUUVCQVFVQUJJSUJBRGphRFEvUTduWnV0M041TUUvN2dQa1QyeG5aUS9tTERMTFVnWGhFSmRTUjg2RlkzaEd0TmE3SEVFb2tFbFF1MERPWHZEbFp3YU4xV0NmTHFCM3kraW4zazhTNzdOT2ZnNnVxcE1ENFc0YjdpZEgvR0hDTHQ5eWozYWMzdUNmQ3Ixc3doOW43QUxZYitMbGM3Sjd6TFJVajdFZ1pDc0NCd1VPTkZCRmkwVWg0c0d5VWhZM3NWN0tsV01saVpFSVhzV3YwT0VJODE4QVlYL1ErdFpvalEramZEYktRMkpVSVlNaC93UXA4WWE5Ty9oT3RVMTZIQUh5RWJTZXVML1o5QnFpVUYxQ2RZY3dVb3lWL1Nzend3eHR2eDlDRFB4YjI1dVhzMDBhdmFOZ1VKdElUZFlEazNObENhaXhvdy9nQkQ0V3VSZW9Sa3hxMGpVU3pIS1FLTXkwPQ=="

  _return_code, value = cfca_signature.check_sign(base64_signature=signature_base64, algorithm='rsa')
  print("check sign return code: {0}".format(_return_code))
  print("value: {0}".format(value))

# 验证证书
  _return_code = cfca_signature.verify_certificate(certificate_path='CFCA_ACS_TEST_CA.cer|CFCA_ACS_TEST_OCA31.cer',
                                             verify_level=4)
  print("check cer code: {0}".format(_return_code))

# 验签 + 证书
  value, _return_code = cfca_signature.check_sign_cer(base64_signature=signature_base64,
                                                 algorithm='rsa',
                                                 certificate_path='CFCA_ACS_TEST_CA.cer|CFCA_ACS_TEST_OCA31.cer',
                                                 verify_level=4)
print("value: {0}".format(value))
print("check cer code: {0}".format(_return_code))
C# 代码示例
Demo 运行环境要求:Windows Server 2008、 Windows Server 2012
SADK.Standard.x64.dll 为 CFCA 加解签 SDK,888888-NEW.pfx 为测试的加签证书(使用前请替换成商户的加签证书),将这两个文件拷贝到运行程序的根目录后运行 Demo。
项目中使用这两个文件时可以将 Sign.cs 文件中这两个文件的位置替换成实际文件的绝对路径。
c#
using Newtonsoft.Json;
using System;
using System.Collections.Generic;
using System.IO;
using System.Linq;
using System.Net;
using System.Text;
using System.Threading.Tasks;

namespace app_plus
{
        class Program
        {
                static void Main(string[] args)
                {
                        // TestCash();
                        TestUpload();
                }


                //文件上传demo
                static void TestUpload()
                {
                        string url = "https://hfpay.testpnr.com/api/alse/file01";
                        string version = "10";
                        string mer_cust_id = "6666000000002619";
                        string attach_no = "abcd" + DateTime.Now.Ticks.ToString("x");
                        string file_name = "test.png";
                        string file_path = "C:\\" + file_name;


                        Dictionary<string, string> info = new Dictionary<string, string>();
                        info.Add("version", version);
                        info.Add("mer_cust_id", mer_cust_id);
                        info.Add("attach_no", attach_no);
                        info.Add("trans_type", "3");
                        info.Add("attach_type", "1");

                        string json_string = JsonConvert.SerializeObject(info, Formatting.None);
                        Sign sg = new Sign();
                        string check_value = sg.sign(json_string);

                        string boundary = "ABCD" + DateTime.Now.Ticks.ToString("x");
                        byte[] firstBoundaryBytes = System.Text.Encoding.ASCII.GetBytes("--" + boundary + "\r\n");
                        byte[] boundaryBytes = System.Text.Encoding.ASCII.GetBytes("\r\n--" + boundary + "\r\n");
                        byte[] endBoundaryBytes = System.Text.Encoding.ASCII.GetBytes("\r\n--" + boundary + "--");

                        string url_with_param = url;
                        bool concat_start = true;
                        foreach (var key in info.Keys)
                        {
                                if (concat_start)
                                {
                                        url_with_param += "?";
                                        concat_start = false;
                                }
                                else
                                {
                                        url_with_param += "&";
                                }
                                url_with_param += key + "=" + info[key];
                        }
                        url_with_param += "&check_value=" + check_value;
                        HttpWebRequest request = request = (HttpWebRequest)WebRequest.Create(url_with_param);
                        request.Method = "post";
                        request.ContentType = "multipart/form-data; boundary=" + boundary;


                        string formItem;
                        byte[] formItemBytes;
                        Stream memStream = new System.IO.MemoryStream();

                        memStream.Write(firstBoundaryBytes, 0, firstBoundaryBytes.Length);
                        formItem = "Content-Disposition: form-data; " +
                                "name=\"attach_file\"; " +
                                "filename=\"" + file_name + "\"\r\n" +
                                "Content-Type: image/png\r\n\r\n";
                        formItemBytes = System.Text.Encoding.UTF8.GetBytes(formItem);
                        memStream.Write(formItemBytes, 0, formItemBytes.Length);
                        using (var fileStream = new FileStream(file_path, FileMode.Open, FileAccess.Read))
                        {
                                byte[] buffer = new byte[1024];
                                int bytesRead = 0;
                                while ((bytesRead = fileStream.Read(buffer, 0, buffer.Length)) != 0)
                                {
                                        memStream.Write(buffer, 0, bytesRead);
                                }
                        }
                        memStream.Write(endBoundaryBytes, 0, endBoundaryBytes.Length);
                        request.ContentLength = memStream.Length;

                        using (var requestStream = request.GetRequestStream())
                        {
                                memStream.Position = 0;
                                byte[] tempBuffer = new byte[memStream.Length];
                                memStream.Read(tempBuffer, 0, tempBuffer.Length);
                                memStream.Close();
                                requestStream.Write(tempBuffer, 0, tempBuffer.Length);
                        }

                        string responseText = null;
                        try
                        {
                                HttpWebResponse httpResponse = (HttpWebResponse)request.GetResponse();
                                using (StreamReader streamReader = new StreamReader(httpResponse.GetResponseStream()))
                                {
                                        responseText = streamReader.ReadToEnd();
                                        Dictionary<string, string> responseJson = (Dictionary<string, string>)JsonConvert.DeserializeObject<Dictionary<string, string>>(responseText);
                                        responseText = responseJson["check_value"];
                                        responseText = sg.unsign(responseText);
                                }
                        }
                        catch (WebException e)
                        {
                                if (e.Response != null)
                                {
                                        using (var errorResponse = (HttpWebResponse)e.Response)
                                        {
                                                using (var reader = new StreamReader(errorResponse.GetResponseStream()))
                                                {
                                                        responseText = reader.ReadToEnd();
                                                }
                                        }

                                }
                        }
                        Console.WriteLine(responseText);
                        while (true) ;
                }
                //取现demo
                static void TestCash()
                {
                        string url = "https://hfpay.testpnr.com/api/acou/cash01";
                        string version = "10";
                        string mer_cust_id = "6666000000002619";

                        Dictionary<string, string> info = new Dictionary<string, string>();
                        info.Add("version", version);
                        info.Add("mer_cust_id", mer_cust_id);
                        info.Add("user_cust_id", "6666000000002619");
                        info.Add("order_date", "20181026");
                        info.Add("order_id", "201673233703");
                        info.Add("trans_amt", "0.39");
                        info.Add("cash_type", "T1");
                        info.Add("bg_ret_url", "https://www.baidu.com");
                        info.Add("dev_info_json","{'ipAddr':'10.99.195.11','devType':'1'}");


                        string json_string = JsonConvert.SerializeObject(info, Formatting.None);
                        Sign sg = new Sign();
                        string check_value = sg.sign(json_string);
                        json_string = sg.unsign(check_value);

                        HttpWebRequest request = request = (HttpWebRequest)WebRequest.Create(url);
                        request.Method = "post";
                        request.ContentType = "application/x-www-form-urlencoded";

                        using (var streamWriter = new StreamWriter(request.GetRequestStream()))
                        {
                                string requestText = "version=" + version + "&" +
                                        "mer_cust_id=" + mer_cust_id + "&" +
                                        "check_value=" + check_value;

                                streamWriter.Write(requestText);
                                streamWriter.Flush();
                                streamWriter.Close();
                        }

                        string responseText = null;
                        try
                        {
                                HttpWebResponse httpResponse = (HttpWebResponse)request.GetResponse();
                                using (StreamReader streamReader = new StreamReader(httpResponse.GetResponseStream()))
                                {
                                        responseText = streamReader.ReadToEnd();
                                        Dictionary<string, string> responseJson = (Dictionary<string, string>)JsonConvert.DeserializeObject<Dictionary<string, string>>(responseText);
                                        responseText = responseJson["check_value"];
                                        responseText = sg.unsign(responseText);
                                }
                        } catch (WebException e) {
                                if (e.Response != null) {
                                        using (var errorResponse = (HttpWebResponse)e.Response)
                                        {
                                                using (var reader = new StreamReader(errorResponse.GetResponseStream()))
                                                {
                                                        responseText = reader.ReadToEnd();
                                                }
                                        }
                                }
                        }
                        Console.WriteLine(responseText);
                        while (true) ;
                }
        }
}
加解签服务
对于其他无法正常进行加解签的场景,我们提供了这样一个微服务(基于java语言),这个微服务提供了加签、解签两个接口,商户通过http请求的形式组织参数请求微服务,从而得到加签、解签的值。 加解签微服务通过war包形式提供出来,需要部署在商户自己内网服务器上,为了部署这个微服务,商户服务器需要安装jdk和tomcat(tomcat安装依赖于jdk,所以要先安装jdk,再安装tomcat),具体步骤如下:
- windos安装jdk
选择下载对应的jdk,并双击执行安装(一直点击下一步默认安装即可,可以选择安装目录):
jdk安装后,需要设置环境变量,右键我的电脑—属性—-高级系统设置就会看到下面的界面:
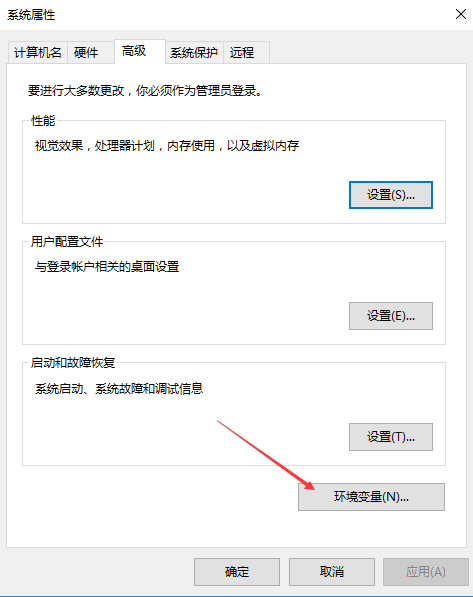
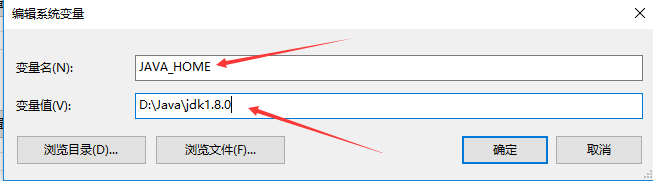
点击上图中的环境变量,点击系统变量下面的新建按钮,变量名JAVA_HOME(代表你的JDK安装路径),值对应的是你的JDK的安装路径。
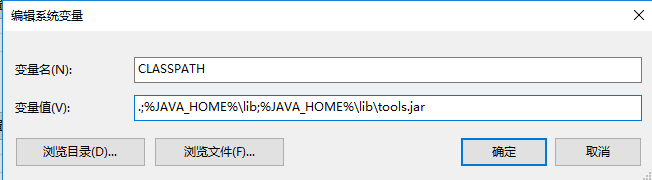
继续在系统变量里面新建一个CLASSPATH变量,其变量值如下图所示(特别注意:最前面有一个英文状态下的小圆点):
在你的系统变量里面找一个变量名是PATH的变量,需要在它的值域里面追加一段如下的代码(此时你应该在你原有的值域后面追加,记得在原有的值域后面记得添加一个英文状态下的分号): %JAVA_HOME%bin;%JAVA_HOME%jrebin;
最后点击确定,此时JDK的环境变量配置就完成了。
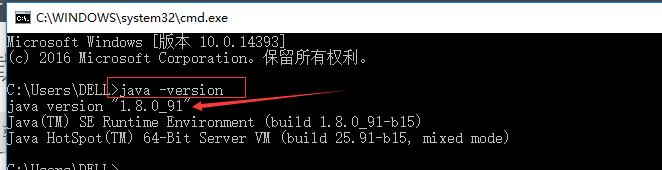
WINDOWS+R键,输入cmd,进入命令行界面,输入java -version命令,可以出现如下图的提示,说明jdk已安装成功
- linux安装jdk
选择下载对应的jdk安装包:
root账号进入linux系统新建目录java

修改文件夹的权限,输入:chmod 777 java

将jdk安装包上传至linux系统java目录,并解压,输入tar -zxvf +需要解压的包名,下图为解压中
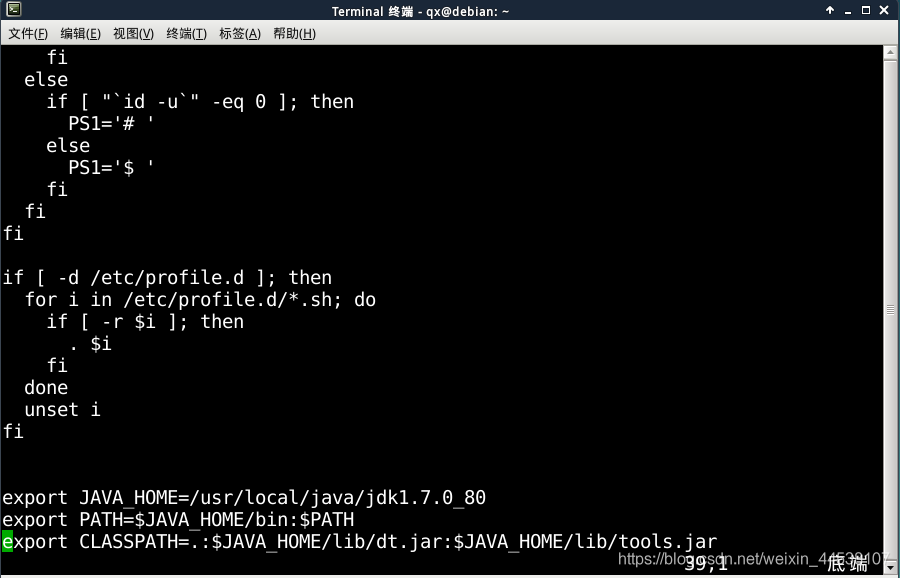
配置环境变量,用vim /etc/profile进入编辑状态,添加如下环境变量
重新加载配置文件,输入:source /etc/profile

输入:java -version,查看安装情况,如下所示表示安装成功

- windos安装tomcat
选择下载对应的tomcat安装包:
apache-tomcat-8.5.64-windows-x86.zip
apache-tomcat-8.5.64-windows-x64.zip
解压到服务器,运行tomcat目录/bin/startup.bat,即可启动tomcat服务

浏览器打开网址http://localhost:8080/,如下图所示说明tomcat已启动
- linux安装tomcat
下载tomcat安装包:
上传压缩包到Linux中,解压缩,命令行:tar -zxvf apache-tomcat-10.0.4.tar.gz
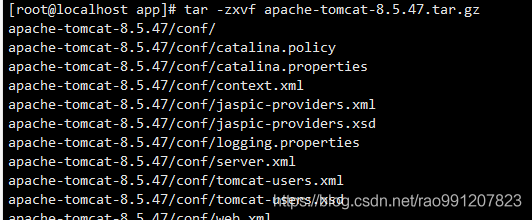
进入解压缩目录apache-tomcat-10.0.4/bin,命令行:./startup.sh启动tomcat服务(关闭命令:./shutdown.sh)

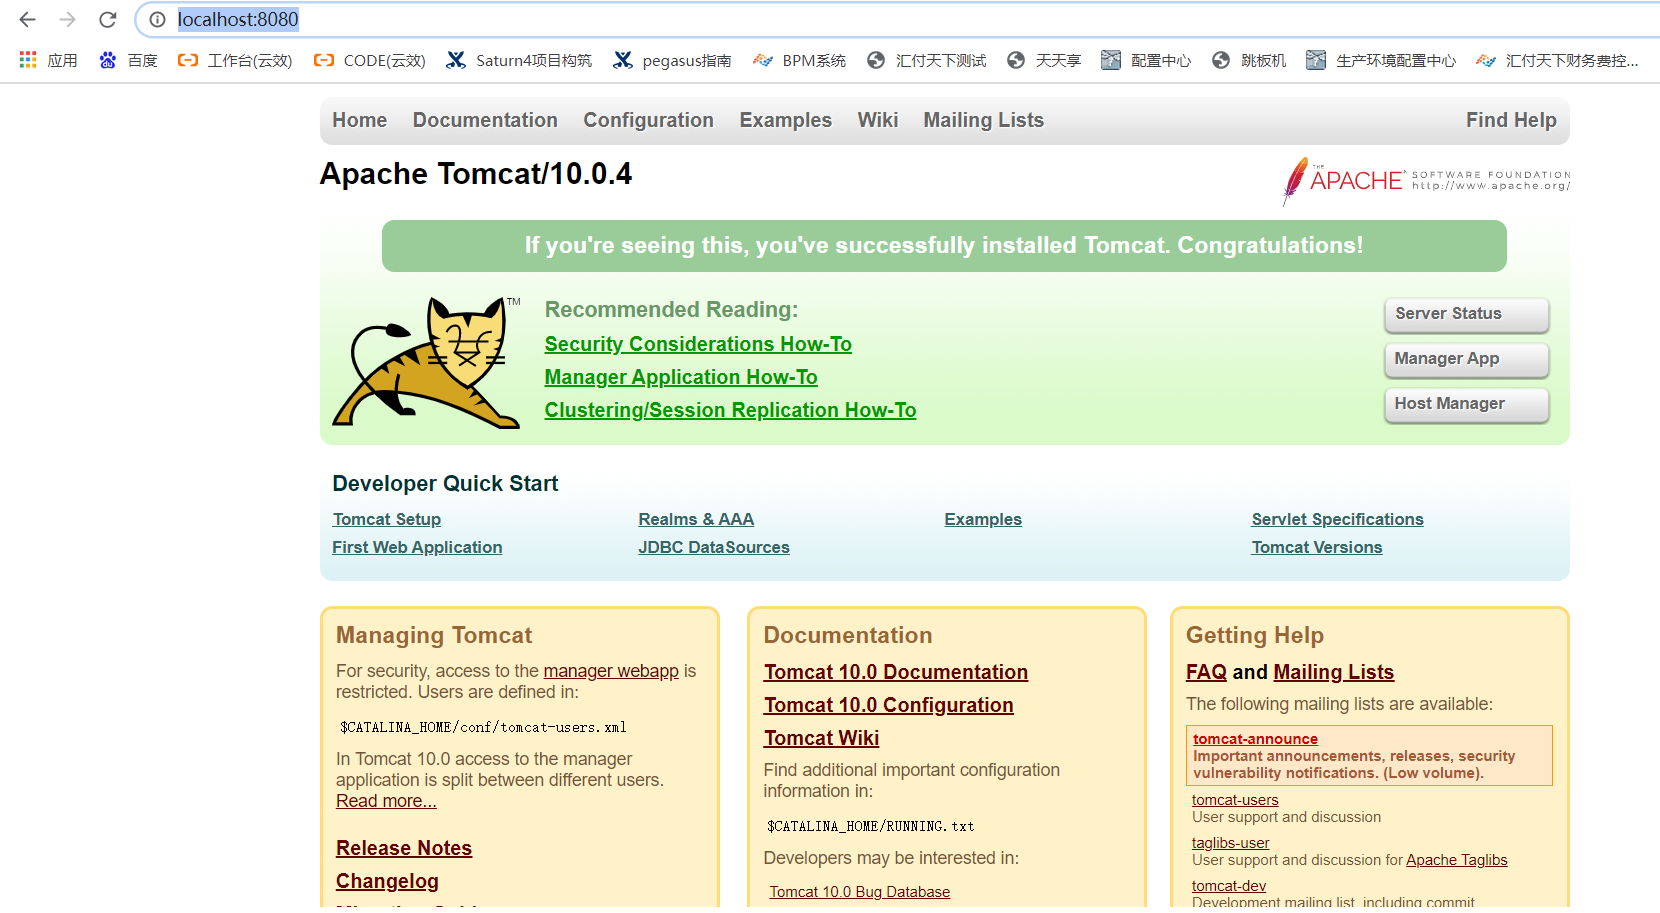
验证启动是否成功,网页输入ip+8080端口,如我的远程访问服务器地址是:http://122.51.153.82:8080/,此时会看到Tomcat猫

- 将微服务的war包部署至tomcat
下载微服务的war包:
将war包上传至tomcat安装目录/webapps/下面
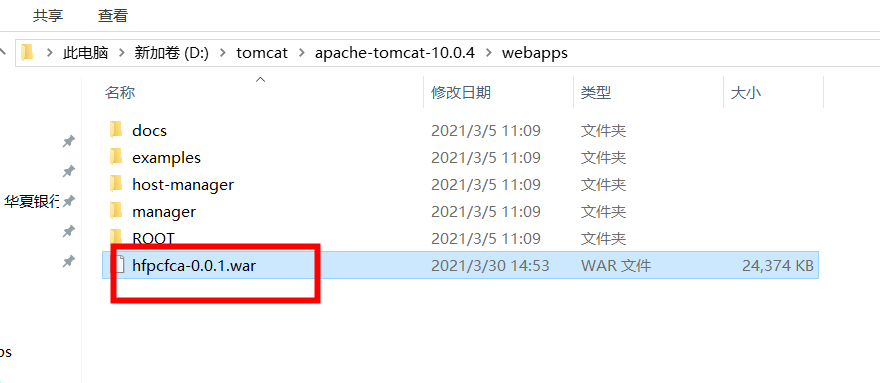
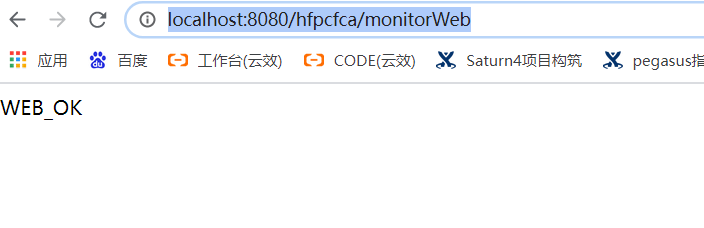
运行tomcat目录/bin/startup.bat,启动tomcat服务(linux运行startup.sh),浏览器访问http://localhost:8080/hfpcfca/monitorWeb如下图,说明部署成功
- 微服务接口-加签
接口说明:该接口将支持商户将需要上送给支付管家系统的请求参数进行快速加签,以满足系统对接要求
请求地址:http://localhost:8080/hfpcfca/cfca/makeSign(ip和端口号根据实际情况确定)
请求参数:
| 参数中文名称 | 参数名称 | 数据格式 | 是否必须 | 说明 |
|---|---|---|---|---|
| 请求参数 | data | json字符串 | 必须 | 其他参数的json格式字符串,例:{“pfx_file_name”:”/cert/product/TEST.pfx”, “pfx_file_pwd”:”123456”}详情见下方参数data说明 |
| 加签明文 | params | json字符串 | 必须 | 需要进行加签的json格式字符串,例:{“mer_cust_id”:”1234567890213456”, “version”:”10”,”cmd_id”:”acct01”} |
参数data说明:
cfca加签参数(pfx_file_name, pfx_file_pwd) 与rsa加签参数二选一填入
| 参数中文名称 | 参数名称 | 数据格式 | 是否必须 | 说明 |
|---|---|---|---|---|
| cfca证书名称 | pfx_file_name | String | 可选 | cfca加签时必须,加签证书所在目录,例:D://cert/product/TEST.pfx 或 /cert/product/TEST.pfx |
| cfca证书密码 | pfx_file_pwd | String | 可选 | cfca加签时必须,加签证书密码 |
| RSA密钥 | rsa_private_key | String | 可选 | rsa加签时必须 |
返回参数
返回参数为JSON格式的String字符串,解析后格式如下:
| 参数中文名称 | 参数名称 | 数据格式 | 是否必须 | 说明 |
|---|---|---|---|---|
| 返回码 | resp_code | String | 必须 | C00000:成功C00003:失败 |
| 返回描述 | resp_desc | String | 必须 | 返回结果的具体描述 |
| 加签类型 | sign_type | String | 必须 | “cfca”:cfca加签,”rsa”: rsa加签 |
| cfca密文 | check_value | String | 可选 | cfca加签时才有值 |
| cfca明文 | json_data | String | 可选 | cfca加签时才有值,为请求参数params的urlEncoded后的字符串,仅做参考比对用 |
| RSA密文 | rsa_sign | String | 可选 | rsa加签时才有值 |
| RSA明文 | rsa_data | String | 可选 | rsa加签时才有值,urlEncoded后的字符串 |
| 商户客户号 | mer_cust_id | String | 可选 | 由请求参数的params中匹配获取 |
| 版本号 | version | String | 可选 | 由请求参数的params中匹配获取 |
- 微服务接口-解签
接口说明:该接口将支持商户将支付管家返回的密文进行快速验签解签,以满足系统对接要求
请求地址:http://localhost:8080/hfpcfca/cfca/verifySign(ip和端口号根据实际情况确定)
请求参数:
| 参数中文名称 | 参数名称 | 数据格式 | 是否必须 | 说明 |
|---|---|---|---|---|
| 加签明文 | params | json字符串 | 必须 | 需要进行验签的json格式字符串,例:{“cert_file”:”/app/etc/CFCA.cer”, “check_value”:”Ubj123dikjda23==”} |
参数params说明:
| 参数中文名称 | 参数名称 | 数据格式 | 是否必须 | 说明 |
|---|---|---|---|---|
| 安全证书 | cert_file | String | 可选 | cfca验签时必须,验签用安全证书所在目录,例:D://cert/product/CFCA_ACS_OCA.cer 或 /cert/product/CFCA_ACS_OCA.cer |
| cfca密文 | check_value | String | 可选 | cfca验签时必须,支付管家返回的cfcf加签后的密文 |
| RSA密文 | rsa_sign | String | 可选 | rsa验签时必须,支付管家返回的rsa加签后的密文 |
| RSA明文 | rsa_data | String | 可选 | rsa验签时必须, 支付管家返回的rsa urlEncoded字符串 |
| RSA公钥 | rsa_public_key | String | 可选 | rsa验签时必须,RSA验签用的公钥 |
返回参数
返回参数为JSON格式的String字符串,解析后格式如下:
| 参数中文名称 | 参数名称 | 数据格式 | 是否必须 | 说明 |
|---|---|---|---|---|
| 返回码 | resp_code | String | 必须 | C00000:成功C00003:失败 |
| 返回描述 | resp_desc | String | 必须 | 返回结果的具体描述 |
| 验签类型 | sign_type | String | 可选 | “cfca”:cfca加签,”rsa”: rsa加签 |
| 验签明文 | params | String | 可选 | 验签成功后返回的对应明文 |
证书下载操作指引
安装证书控件
非IE浏览器下,点击邮件中的申请链接,登录安全证书下载控台。首次登录需要安装证书控件,系统提示如下图。点击【确定】,下载保存证书控件到本地,并安装。
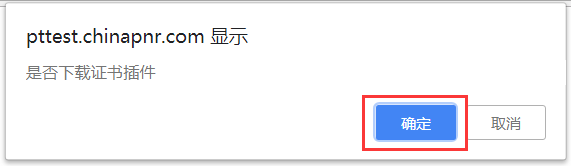
- 安装过程中如果弹出如下的提示框,一定要选择允许。

- 安装完成后,重起浏览器。
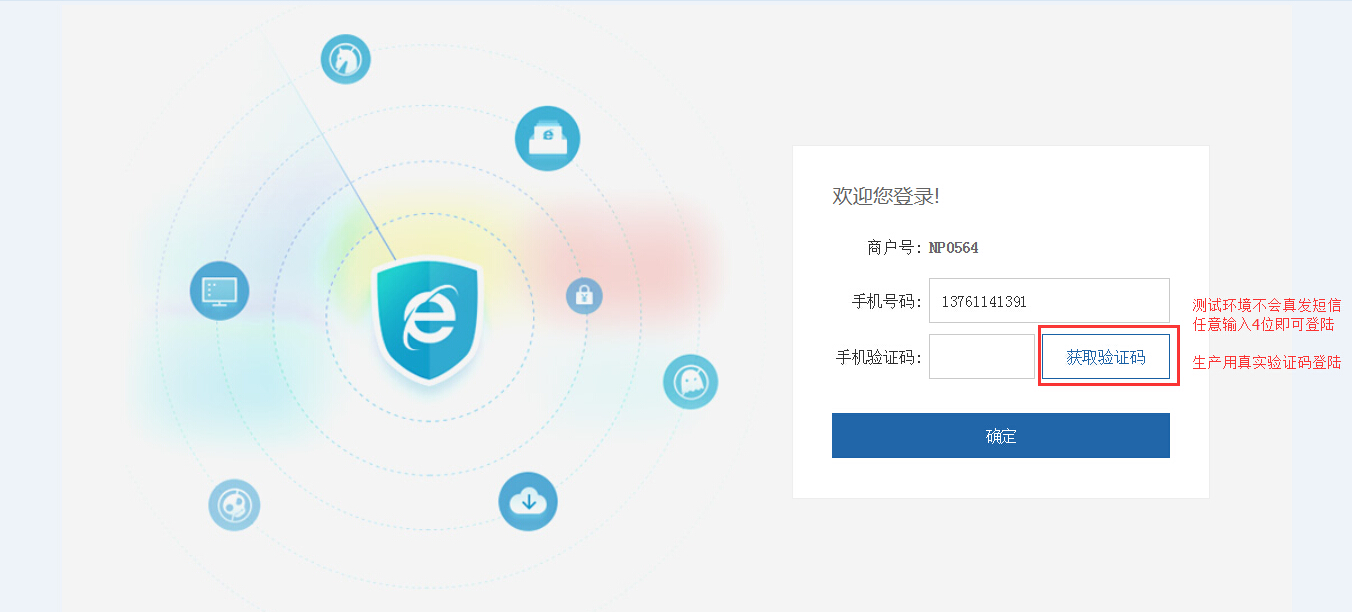
IE 浏览器下,进入邮件中的申请链接地址,输入联系人手机号,获取验证码(下载测试证书时,验证码随便输入4位,不做校验)。
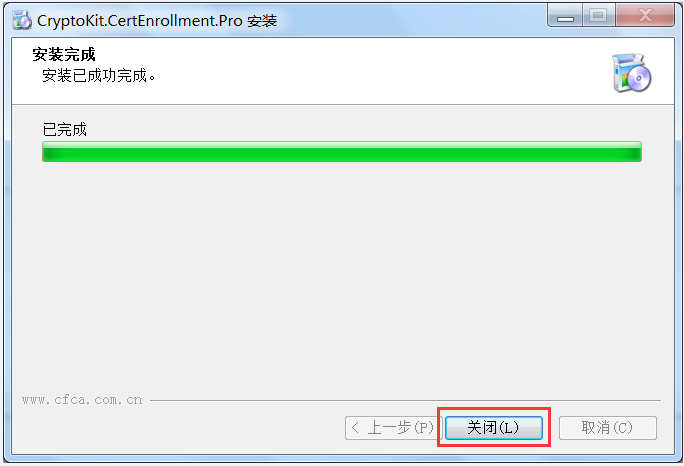
- 点击【下载证书】,系统会自动下载安装。
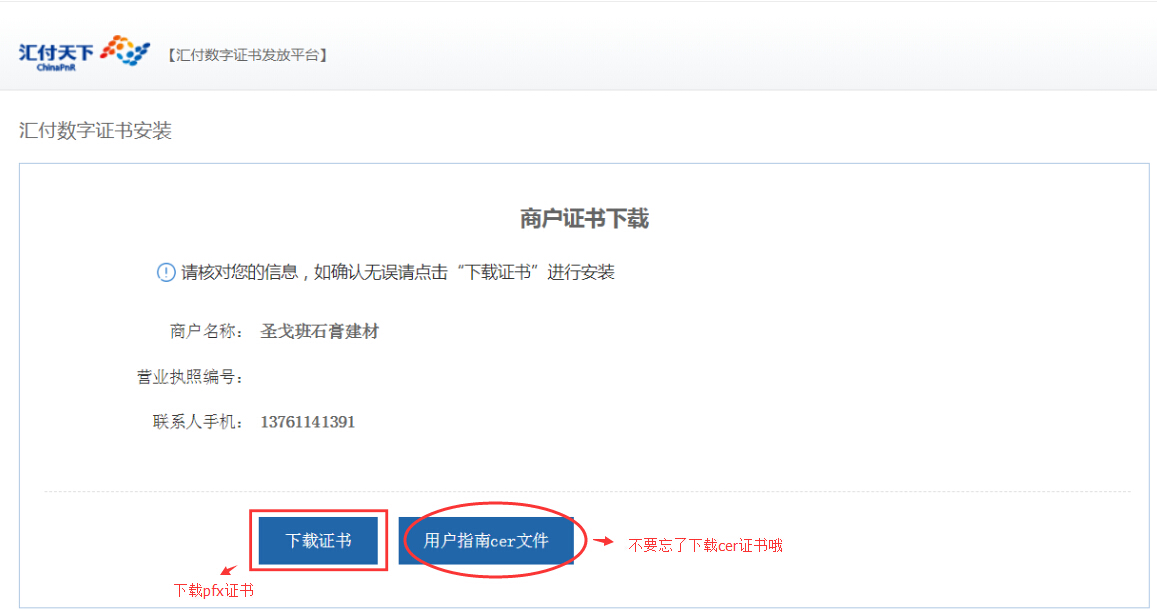
- 安装成功后提示。(注意不要忘记下载右边的【用户指南cer文件】来获取cer证书哦!)

导出加签证书
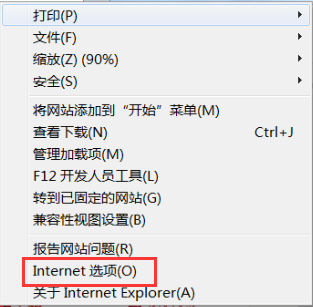
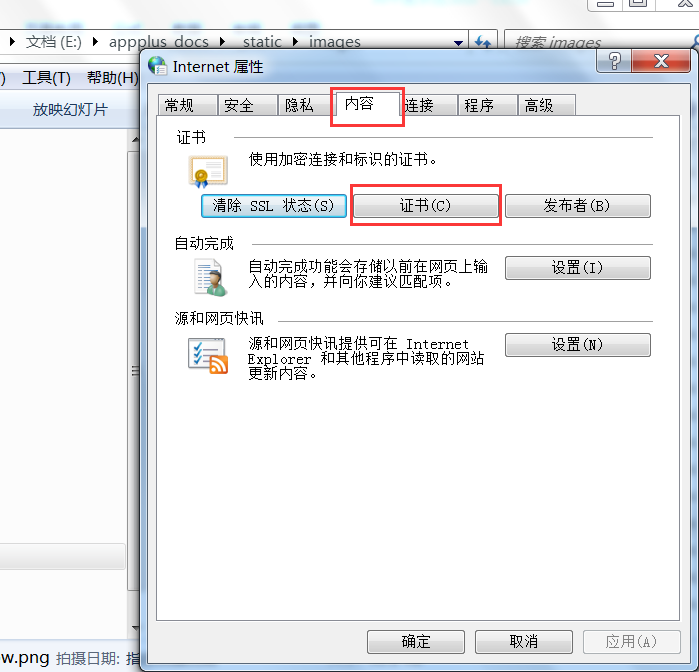
- 点击浏览器菜单栏“工具”菜单,单击“Internet选项”。
- 在弹出的对话框中点击【内容】选项卡,单击【证书】按钮。
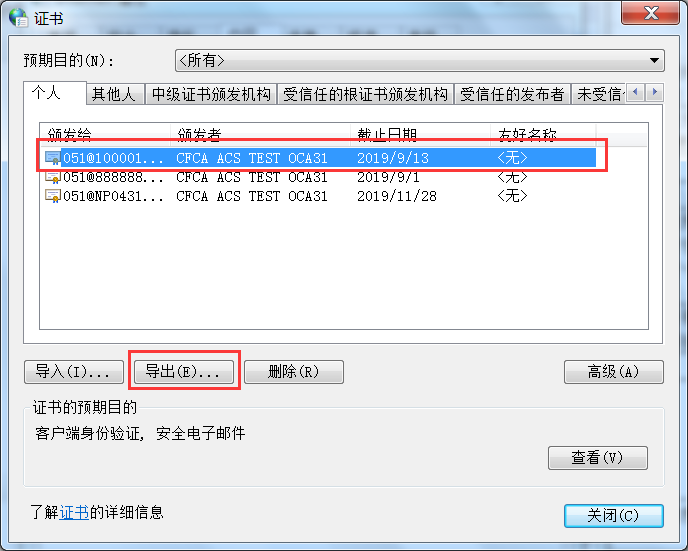
- 选中之前安装的证书,点击【导出】。
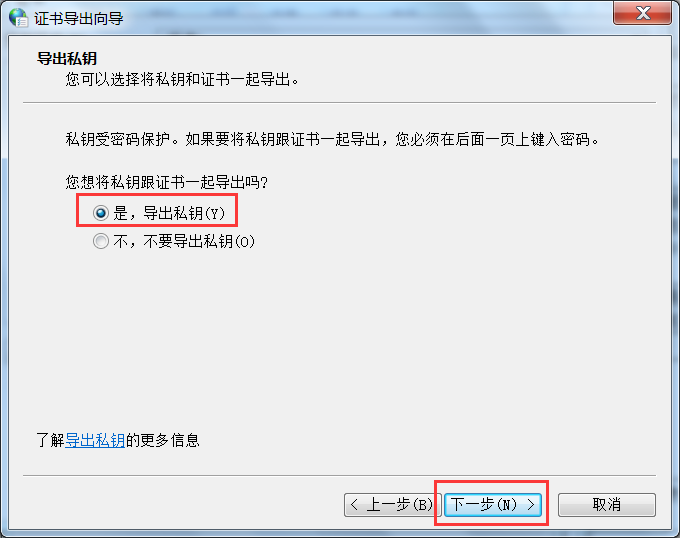
- 选择导出私钥,点击【下一步】。
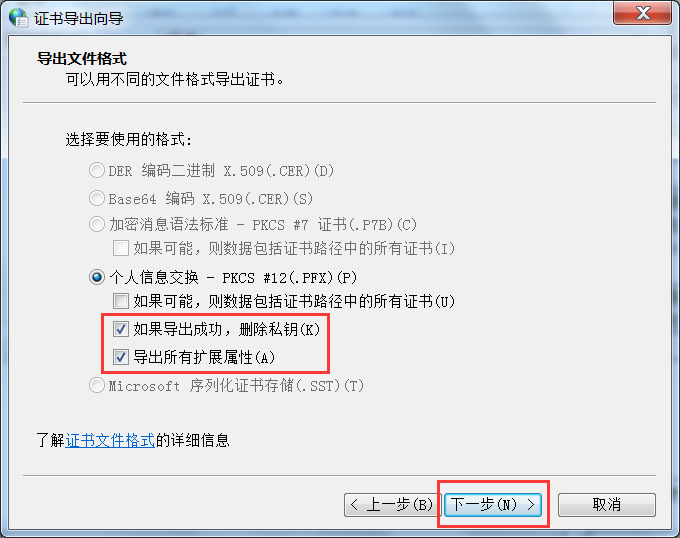
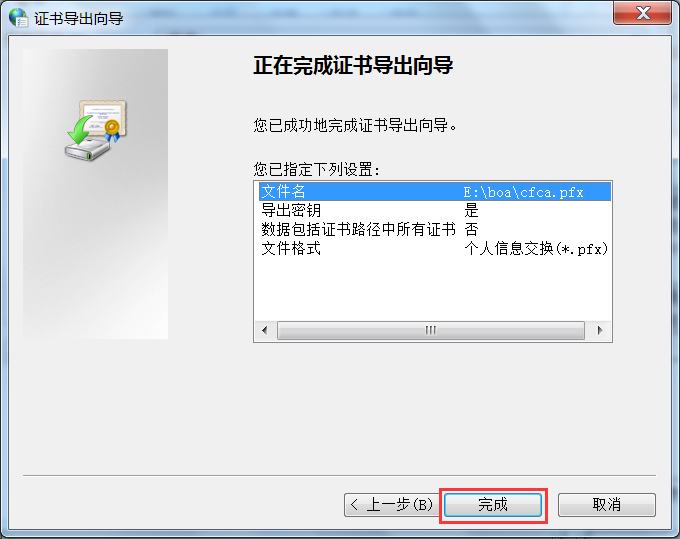
- 选择“个人信息交换”,下属二级选项可根据实际需要勾选,建议全选。点击【下一步】。
- 输入并确认密码,点击【下一步】。
注意:请记下这里输入的密码,调用加签方法时需要用到这个密码
- 指定文件名和存放路径。点击【浏览】可更改存放路径,选择完成后点击【下一步】。
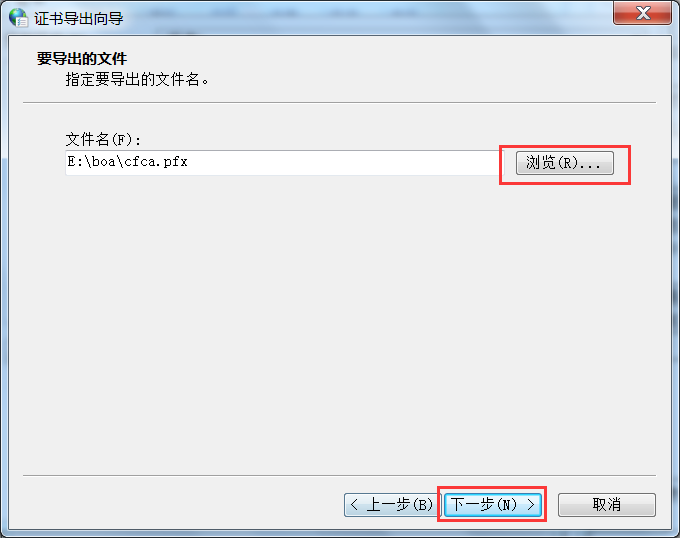
- 点击【完成】,获得 pfx 文件。
下载解签证书

点击【用户指南 cer 文件】,系统会自动下载解签证书。
CFCA_ACS_TEST_OCA31.cer 为测试环境用的解签证书,CFCA_ACS_OCA31.cer 为生产环境用的解签证书。
更新记录
2022.04.07 V1.1.7
- 新增用户信息变更接口
2022.02.10 V1.1.6
- 新增垫资和还款接口
2021.11.17 V1.1.5
- 新增支付宝短链预下单
- 支付异步返回参数
2021.01.20 V1.1.4
- 企业开户后台版,个体户开户后台版,支持开通线上线下模式
- 增加子账户接口支持新增线下账户类型
- 开户状态查询接口返回线下账户号
- 用户基本信息查询支持上级客户号
2020.12.18 V1.1.3
- 余额支付接口pay011和快捷接口pay001:新增关单时间
2020.11.18 V1.1.2
- 新增接口:信息采集版个人开户user06
2020.09.09 V1.1.1
- 新增接口:众邦虚拟账户余额查询接口
- 交易状态查询接口请求参数transType新增加字典
- 新增接口:众邦虚拟账户余额支付短信发送
- 新增接口:众邦虚拟账户余额支付
- 新增接口:众邦虚拟账户取现
- 修改接口企业开户、企业开户页面、取现绑卡接口支持开银行虚拟账户
2020.08.04 V1.1.0
- 新增商户微信支付宝入驻 省市区编码附件
2020.07.22 V1.0.9
- 延时分账确认接口新增字段:share_fee_mode
- 延时分账确认接口字段trans_amt变更描述
- 延时分账确认接口新增案例说明
- 所有支付接口的返回值字段real_trans_amt描述进行了修改
2020.07.22 V1.0.8
- 延时分账确认新增手续费分摊模式
2020.06.03 V1.0.7
- 新增代理商开户接口mer001
- 商户微信支付宝入驻接口sett01
- 商户入驻信息修改接口sett02
- 商户微信入驻配置接口sett03
- app支付接口 添加pay_info示例说明
- 余额查询接口返回参数添加在途资金
2020.04.08 V1.0.6
- 企业开户类接口支持免审
2020.03.16 V1.0.5
- 新增钱包类接口
2020.03.05 V1.0.4
- app支付接口新增支付宝app支付(直连)支付方式
- 交易状态查询接口新增查询支付宝app支付(直连)的订单
- app支付接口支持线上线下手续费路由配置
2020.02.17 V1.0.4
- app支付接口新增微信H5支付(直连)支付方式
2019.08.29 V1.0.2
- app支付接口user_cust_id改为可选; 增加手机SDK部分 ;附件增加网银网关号信息
2019.07.25 V1.0.1
- 个人开户接口证件有效期开始日期和证件有效期结束日期,变成可选; 协议代扣添加订单超时时间; 代扣签约绑卡确认接口,删除短信订单号和短信订单日期;
2019.07.22 V1.0.0
- 创建文档;