API 文档简介
企账通采用了 HTTP 协议提供各类接口,所有接口都是统一请求地址,方便商户简单、快速接入。本 API 包含 2 种调用方式,页面浏览器类和系统调用类。
- 页面浏览器类:需要从前端页面以 Form 表单的形式发起请求,浏览器会自动跳转至汇付的相关页面(如网银支付),用户在该页面完成相关业务操作后再回跳到商户指定页面,页面方式返回的是标准的表单格式。
- 系统调用类:直接从服务端发起 HTTP 请求,API 会同步返回请求结果,返回的数据格式都是规范 JSON 格式。
接入指南
第一步:申请加解签证书
商户提交资料给汇付,汇付开通测试商户。汇付会以邮件方式通知联系人(商户申请时提供的联系人邮箱),邮件中的商户客户号、子账户号会在 API 调用时用到。
第二步:下载证书
商户联系人收到的邮件中,点击链接地址下载证书。证书下载操作请参考 证书下载操作指引。
| 证书 | 用途 |
|---|---|
| **********.cer | 用于解签 API 的返回参数 |
| **********.pfx | 用于加签 API 的请求参数 |
第三步:调用接口
技术接入前请仔细阅读接口文档里的内容:
| 联调请求 URL | https://eacloud.testpnr.com/api/publicRequests |
| 生产请求 URL | https://eacloud.cloudpnr.com/api/publicRequests |
| 是否需要证书 | 是 |
| 请求方式 | POST |
API 规范概述
参数规范
- 参数为可选项时,JSON 格式中可以不包含该参数,或该参数内容为空;
- 所有参数值不应该包含与 JSON 格式冲突的特殊字符,如括号,逗号,双引号,冒号等;
- 金额单位为元,精确到分,如:1200.00,359.14;
- 订单日期为定长 8 的字符串,格式为 YYYYMMDD,如 20140802;
订单规范
通过商户客户号、订单号、订单日期来标识订单的唯一性,所有接口下唯一;
由于网络的不稳定性等原因,相同订单的交易应答返回给商户订单系统时,有可能会出现以下两种情况:
1.同一订单请求多次,先支付完成的订单返回参数后通知到商户;
2.同一笔订单收到多次支付结果;
处理原则:商户以订单的成功状态为终态,商户收到订单支付成功的应答后,如果再次收到订单支付失败的应答,不做处理即可。
API 调用规范
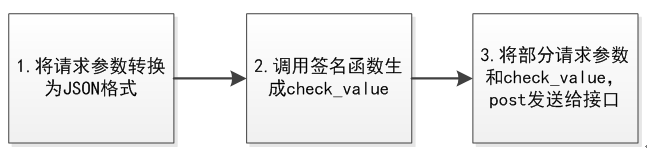
举例说明:假设接口参数为:version=10,cmd_id=101,mer_cust_id=6666000000011499,user_name=张三,bg_ret_url=http://mertest.chinapnr.com/npay
第一步:将接口参数转换成 JSON 格式字符串。
{"version":"10","cmd_id":"101","mer_cust_id":"6666000000011499","user_name":"张三","bg_ret_url":"http://mertest.chinapnr.com/npay"}
第二步:将第一步的 JSON 字符串使用 pfx 证书和密码进行加密,生成 check_value。
SignResult signResult  = CFCASignature.signature(pfxFile, pfxFilePwd, params, "utf-8");
String check_value = signResult.getSign();
第三步:组装请求参数 version、cmd_id、mer_cust_id 和 check_value,以 post 方式请求接口。
String postStr = "cmd_id=101&version=10&mer_cust_id=6666000000011499&check_value=第二步生成的加签串";
HttpRequest httpRequest = HttpRequest.post("http://mertest.chinapnr.com/npay/merchantRequest").charset("UTF-8");
HttpResponse httpResponse = httpRequest.contentType("application/x-www-form-urlencoded").body(postStr).send();
注意:组装请求参数时 version、cmd_id 和 mer_cust_id 必须和第一步的接口参数中的 version、cmd_id 和 mer_cust_id 值保持一致。
API 应答接收规范
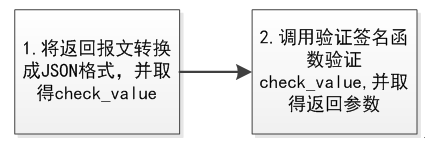
举例说明(以交易状态查询接口返回的数据为例):
第一步:从应答报文中取得 check_value
假设返回数据如下:
{"check_value":"B170E66B00D344F8CEA68C3A84F0ED2207805147793F806CBD3D3E166B57F511ABEB7D5D7A725ECEFDC640FDC2F7102CD8D470CB0BE18A3B4ADE870689D7FCBD4CA55DD5C2E1D6BFC3F30514B0813D8E680708B44A1C1637780CA0D998EF22C10B7E4B8954F304F226BB50F091A60C939F7C4DB513261FC47667757550C7911E"}
第二步:解签 check_value,并取得返回参数
将第一步取得的 check_value,使用 cer 证书文件和汇付的商户号(100001)进行解签,解签结果如:
VerifyResult{code='000', message='验签成功', content=[101, 121, 74, 106, 97, 71, 86, 106, 97, 49, 90, 104, 98, 72, 86, 108, 73, 106, 111, 57]}
在对 content 进行UTF-8编码转换成字符串,得到返回参数的 JSON 格式字符串,例如:
{"extension":"extension","trans_stat":"","cmd_id":"301","div_detail":"","resp_code":"301000","mer_priv":"mer_priv","trans_amt":"","trans_type":"01","order_date":"20160801","order_id":"600001","mer_cust_id":"6666000000024878","resp_desc":"查询成功"}
API 特点
- 为保证接口的安全性,每笔交易都通过 CFCA 进行签名,篡改签名将导致验签失败,交易无法正常进行;
- 商户可以动态地将每笔交易的返回地址指向不同的交易网站,适合于多网站和多应用的商户;
- 商户在接口中可以自定义域,本平台返回时,会将该域原样返回,供商户实现特定的功能;
- 本平台通过后台方式向商户发送交易结果,通过分析商户的返回页面,可以准确地知道商户是否收到交易应答结果,从而对发送失败的交易采取自动重发;
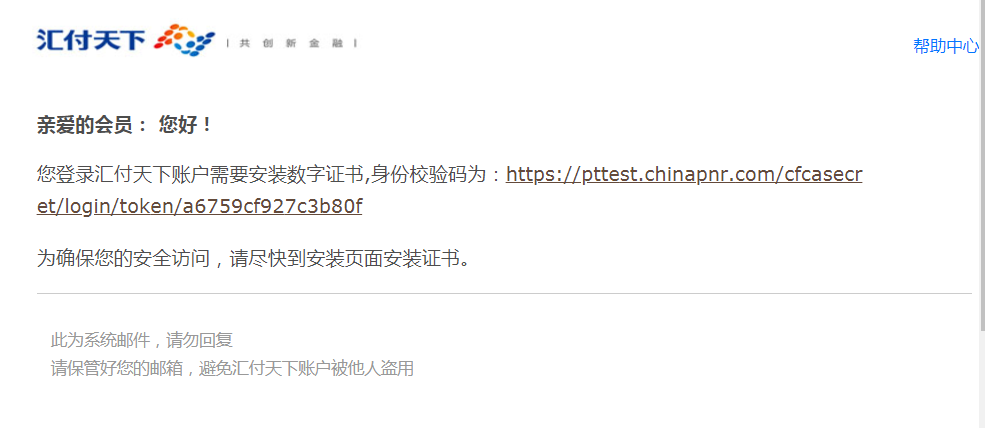
加解签简介
本 API 对商户与汇付之间请求数据采用的是 CFCA 证书加解签方式。测试时开发人员可以在开发者站点申请下发测试用的证书。生产环境的证书是在正式商户开通后,由汇付中台人员下发的。下发证书后,商户联系人邮箱会收到如下图的邮件通知。
证书下载操作指引
安装证书控件
非IE浏览器下,点击邮件中的申请链接,登录安全证书下载控台。首次登录需要安装证书控件,系统提示如下图。点击【确定】,下载保存证书控件到本地,并安装。
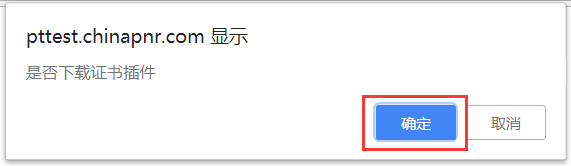
- 安装过程中如果弹出如下的提示框,一定要选择允许。

- 安装完成后,重起浏览器。

IE 浏览器下,进入邮件中的申请链接地址,输入联系人手机号,获取验证码(下载测试证书时,验证码随便输入,不做校验)。
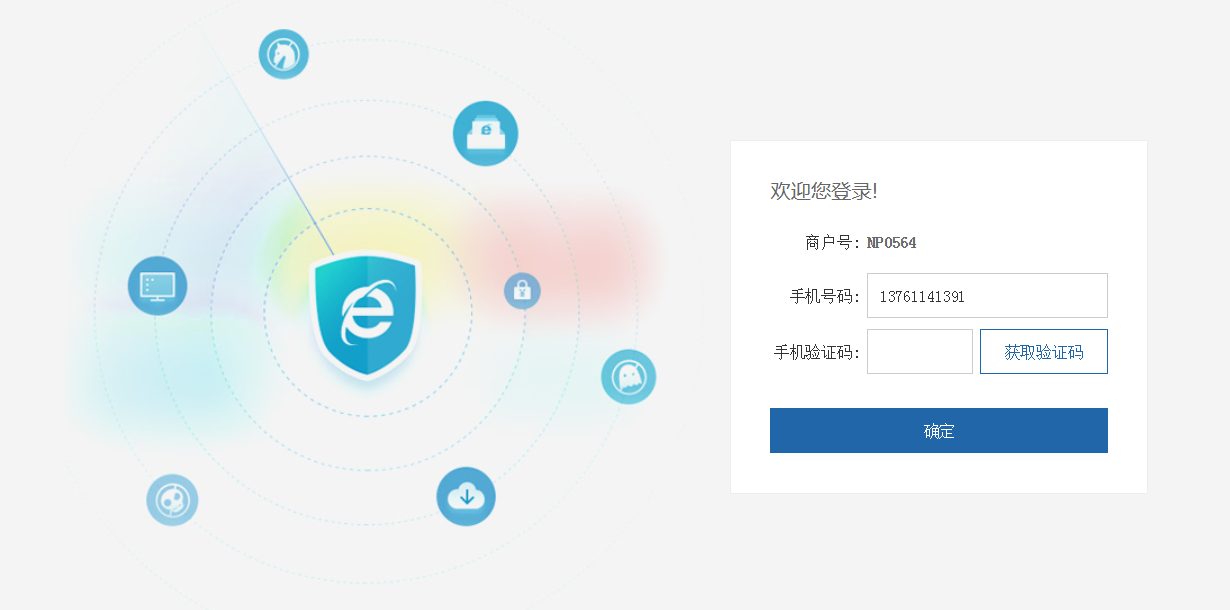
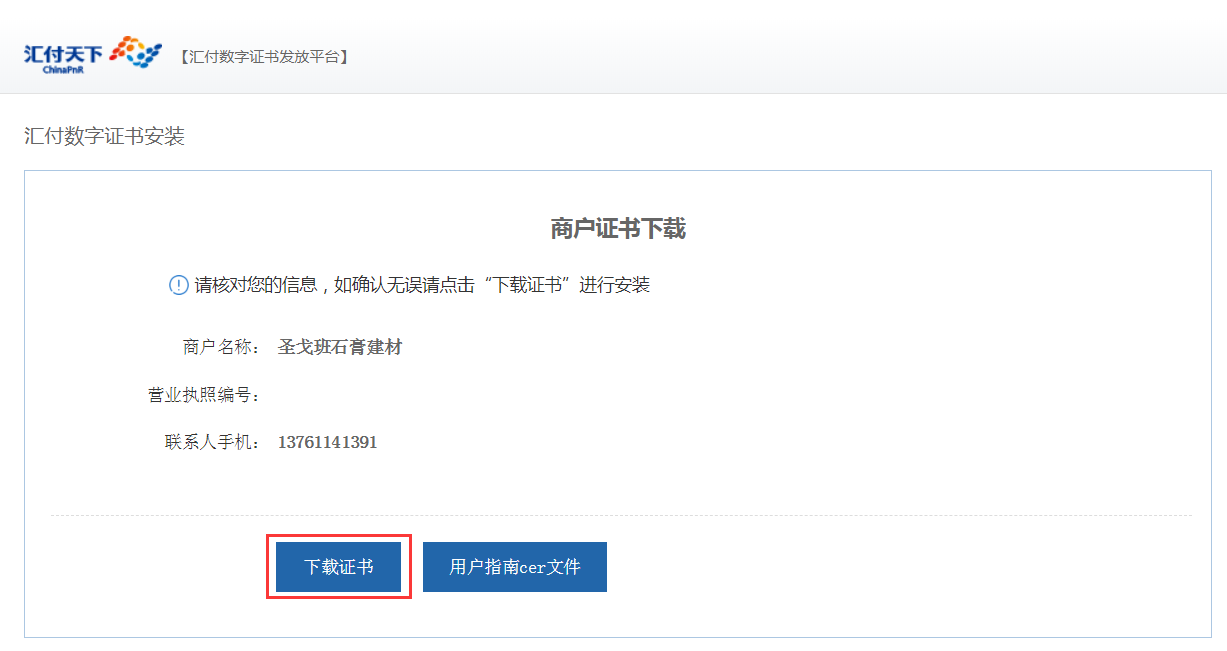
- 点击【下载证书】,系统会自动下载安装。
- 安装成功后提示。

导出加签证书
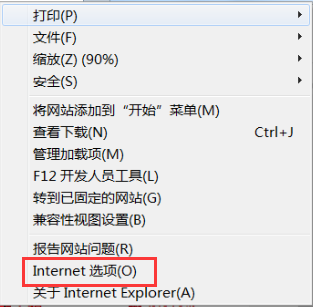
- 点击浏览器菜单栏“工具”菜单,单击“Internet选项”。
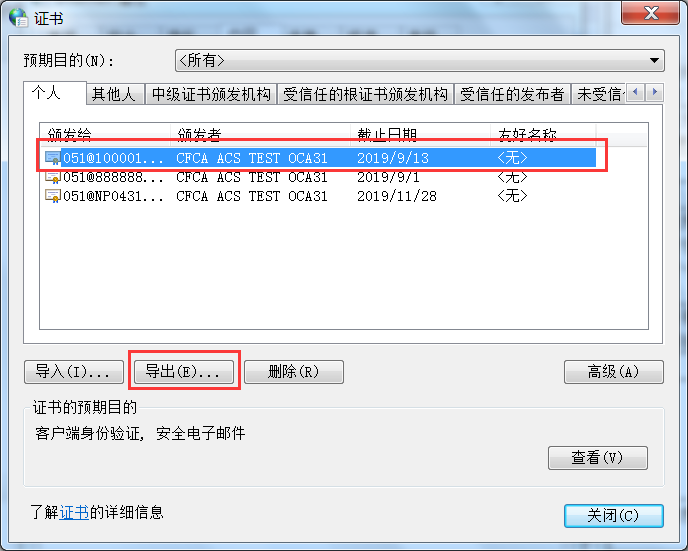
- 在弹出的对话框中点击【内容】选项卡,单击【证书】按钮。

- 选中之前安装的证书,点击【导出】。
- 选择导出私钥,点击【下一步】。

- 选择“个人信息交换”,下属二级选项可根据实际需要勾选,建议全选。点击【下一步】。
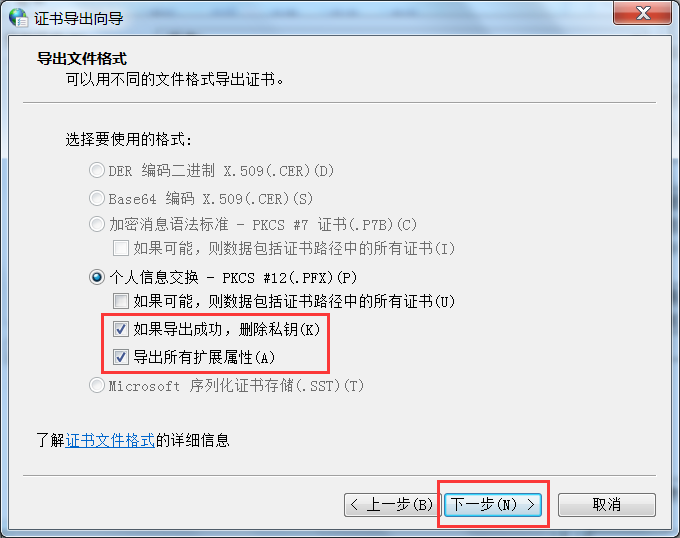
- 输入并确认密码,点击【下一步】。
注意:请记下这里输入的密码,调用加签方法时需要用到这个密码
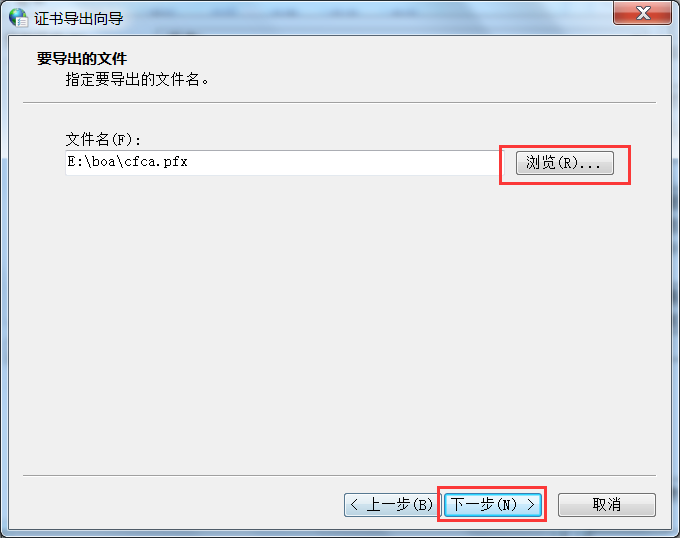
- 指定文件名和存放路径。点击【浏览】可更改存放路径,选择完成后点击【下一步】。
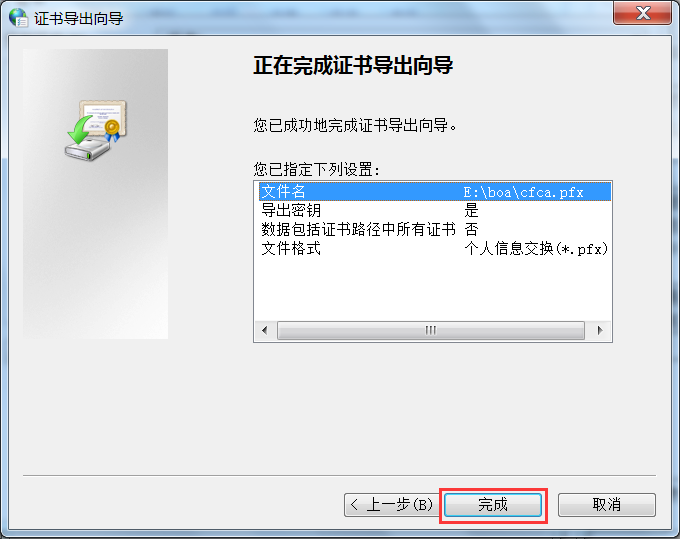
- 点击【完成】,获得 pfx 文件。
下载解签证书
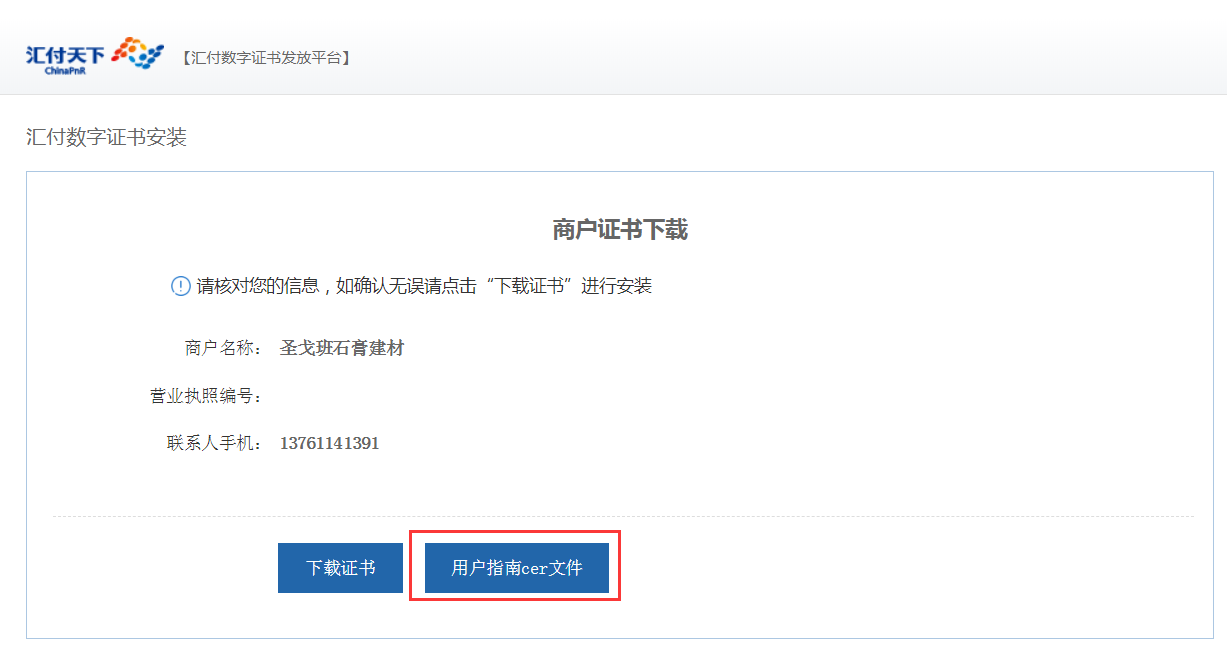
点击【用户指南 cer 文件】,系统会自动下载解签证书。
CFCA_ACS_TEST_OCA31.cer 为测试环境用的解签证书,CFCA_ACS_OCA31.cer 为生产环境用的解签证书。
JAVA 代码示例
加签示例
private static String sign(String valueObj) {
       // 加签用 pfx 文件,请换成商户自己导出的证书
       String pfxFile = "/app/etc/product/888888-汇付测试商户.pfx";
       // 加签用密码,导出 pfx 证书时的密码
       String pfxFilePwd = "888888";
       // 加签
       SignResult signResult  = CFCASignature.signature(pfxFile, pfxFilePwd, valueObj, "utf-8");
       if ("000".equals(signResult.getCode())) {
           return signResult.getSign();
       } else {
           return "加签失败";
       }
    }
验签示例
public static String parseResult(String responseJson) throws Exception {
    JSONObject jsonObject = JSON.parseObject(responseJson);
    String sign = jsonObject.getString("check_value");
            // 解签用的证书,请换成商户自己下载的证书
    String cerFile = "/app/etc/product/CFCA_ACS_OCA31.cer";

    VerifyResult verifyResult = CFCASignature.verifyMerSign("100001", sign, "utf-8", cerFile);

    if ("000".equals(verifyResult.getCode())) {
        String content = new String(verifyResult.getContent(), Charset.forName("utf-8"));
        return content;
    } else {
        return "验签失败";
    }
}
PHP 代码示例
解压后,参考 cfcaphp/v3.4.0.1/文档/PHP版服务器端工具包(Linux版)软件使用手册.pdf
Demo 运行
1.安装的 PHP 环境(版本 v5.6、版本 v7.0 和 版本 v7.1)
2.安装运行环境(glibc 库需要在 v2.17 以上)
3.修改 PHP 的配置文件 php.ini
修改 php.ini,使 php 允许加载扩展,并将当前扩展添加到其扩展列表中
把 libSADKExtension.so 需要放到对应的 php 环境的扩展文件夹内 例如:/usr/lib/php/20160303/libSADKExtension.so
enable_dl = On
extension=libSADKExtension.so
重启 php-fpm 服务 /etc/init.d/php-fpm restart
4.通过命令行终端运行 Demo 文件
cfcaphp/v3.4.0.1/ 程序 /Demo/huifuSADKExtension.php 为例子
| Msg PKCS7-attached Sign | 为使用 pfx 证书加签 |
| PKCS7-attached-Verify | 为验证汇付的签名 |
| cfca_verifyCertificate | 为验证证书链合法性 |
| cfca_getCertificateInfo | 为获取证书信息(非必要) |
<?php
/*
 *  SADKExtension.php
 *
 *  An example file to show the working of a function call with sadk.
 */
try
{
        $nResult = 0;

        $strLogCofigFilePath = "./cfcalog.conf";
        $nResult = cfca_initialize($strLogCofigFilePath);
        if (0 != $nResult) {
                throw new Exception("\n cfca_Initialize error:".$nResult."\n");
        }
        echo "cfca_initialize:nResult:".$nResult."\n\n";

        $strSignAlg = "RSA";
        $strSignSourceData = "TestData";
        $strPfxFilePath = "../TestData/RSA/AS0381.pfx";
        $strPfxPassword = "888888";
        $strHashAlg = "SHA-256";


        // Msg PKCS7-attached Sign
        $strMsgPKCS7AttachedSignature = "";
        $nResult = cfca_signData_PKCS7Attached($strSignAlg, $strSignSourceData, $strPfxFilePath, $strPfxPassword, $strHashAlg, $strMsgPKCS7AttachedSignature);
        if (0 != $nResult) {
                throw new Exception("\n cfca_signData_PKCS7Attached error:".$nResult."\n");
        }
        echo "cfca_signData_PKCS7Attached-strMsgPKCS7AttachedSignature:".$strMsgPKCS7AttachedSignature."\n";
        echo "cfca_signData_PKCS7Attached-nResult:".$nResult."\n\n";

        // PKCS7-attached-Verify
        $strMsgP7AttachedSignCertContent = "";
        $strMsgP7AttachedSource = "";
        $nResult = cfca_verifyDataSignature_PKCS7Attached($strSignAlg, $strMsgPKCS7AttachedSignature, $strMsgP7AttachedSignCertContent, $strMsgP7AttachedSource);
        if (0 != $nResult) {
                throw new Exception("\n cfca_verifyDataSignature_PKCS7Attached error:".$nResult."\n");
        }
        echo "cfca_verifyDataSignature_PKCS7Attached-strMsgP7AttachedSignCertContent:".$strMsgP7AttachedSignCertContent."\n";
        echo "cfca_verifyDataSignature_PKCS7Attached-strMsgP7AttachedSource:".$strMsgP7AttachedSource."\n";
        echo "cfca_verifyDataSignature_PKCS7Attached-nResult:".$nResult."\n\n";


        // Cert manipulate
        $nCertVerifyFlag = 4;
        $strTrustedCACertFilePath = "../TestData/RSA/CFCA_ACS_TEST_OCA31.cer|../TestData/RSA/CFCA_ACS_TEST_CA.cer";
        $strCRLFilePath = "../TestData/RSA/crl6974.crl";
        #$strCRLFilePath = null;
        #$nResult = cfca_verifyCertificate($strMsgP7AttachedSignCertContent, $nCertVerifyFlag, $strTrustedCACertFilePath,$strCRLFilePath);
        $nResult = cfca_verifyCertificate($strMsgP7AttachedSignCertContent, $nCertVerifyFlag, $strTrustedCACertFilePath,"");
        if (0 != $nResult) {
                throw new Exception("\n cfca_verifyCertificate error:".$nResult."\n");
        }
        echo "cfca_verifyCertificate-nResult:".$nResult."\n\n";

        $strInfoType = "CertType";
        $strCertType = "";
        $strSubjectDN = "";
        $strSubjectCN = "";
        $strIssuerDN = "";
        $strSerialNumber = "";
        $strValidFrom = "";
        $strValidTo = "";
        $nResult = cfca_getCertificateInfo($strMsgP7AttachedSignCertContent, $strInfoType, $strCertType);
        if (0 != $nResult) {
                throw new Exception("\n cfca_getCertificateInfo error:".$nResult."\n");
        }
        echo "cfca_getCertificateInfo-strCertType:".$strCertType."\n";
        echo "cfca_getCertificateInfo-nResult:".$nResult."\n\n";

        $nResult = cfca_getCertificateInfo($strMsgP7AttachedSignCertContent, "SubjectDN", $strSubjectDN);
        if (0 != $nResult) {
                throw new Exception("\n cfca_getCertificateInfo error:".$nResult."\n");
        }
        echo "cfca_getCertificateInfo-strSubjectDN:".$strSubjectDN."\n";
        $nResult = cfca_getCertificateInfo($strMsgP7AttachedSignCertContent, "SubjectCN", $strSubjectCN);
        if (0 != $nResult) {
                throw new Exception("\n cfca_getCertificateInfo error:".$nResult."\n");
        }
        echo "cfca_getCertificateInfo-strSubjectCN:".$strSubjectCN."\n";
        $nResult = cfca_getCertificateInfo($strMsgP7AttachedSignCertContent, "IssuerDN", $strIssuerDN);
        if (0 != $nResult) {
                throw new Exception("\n cfca_getCertificateInfo error:".$nResult."\n");
        }
        echo "cfca_getCertificateInfo-strIssuerDN:".$strIssuerDN."\n";
        $nResult = cfca_getCertificateInfo($strMsgP7AttachedSignCertContent, "SerialNumber", $strSerialNumber);
        if (0 != $nResult) {
                throw new Exception("\n cfca_getCertificateInfo error:".$nResult."\n");
        }
        echo "cfca_getCertificateInfo-strSerialNumber:".$strSerialNumber."\n";
        $nResult = cfca_getCertificateInfo($strMsgP7AttachedSignCertContent, "ValidFrom", $strValidFrom);
        if (0 != $nResult) {
                throw new Exception("\n cfca_getCertificateInfo error:".$nResult."\n");
        }
        echo "cfca_getCertificateInfo-strValidFrom:".$strValidFrom."\n";
        $nResult = cfca_getCertificateInfo($strMsgP7AttachedSignCertContent, "ValidTo", $strValidTo);
        if (0 != $nResult) {
                throw new Exception("\n cfca_getCertificateInfo error:".$nResult."\n");
        }
        echo "cfca_getCertificateInfo-strValidTo:".$strValidTo."\n";


        $nResult = cfca_uninitialize();
        if (0 != $nResult) {
                throw new Exception("\n cfca_uninitialize error:".$nResult."\n");
        }
        echo "cfca_uninitialize-nResult:".$nResult."\n";
}
catch(Exception $e)
{
        echo "Message:".$e->getMessage();
        cfca_uninitialize();
}

?>
接口调用 DEMO
JAVA 版 DEMO
DEMO 分别提供了页面浏览器调用方式的快捷支付 APP 版接口和后台系统调用方式的 APP 支付接口调用示例。使用 DEMO 之前商户需要申请 CFCA 加解签证(商户在汇付开户后,会有邮件通知下载)
硬件需求
服务可以部署在 linux 和 windows 等具有 JVM 环境的服务容器内,比如 jboss,tomcat 等(暂提供 jboss)。安装 JDK1.7 并配置好 JDK 的环境变量。
部署服务
将证书文件放到服务器 $path 目录下,上传 war 包到服务器。
启动服务器
- Windows服务器下执行**/jboss/bin/standalone.bat -DmerCertPath=#商户证书地址.pfx -DpfxparTest=#密码 -DhsCertPath=#汇付证书地址.cer
如:**/jboss/bin/standalone.bat -DpfxFile=”/app/etc/product/888888-NEW.pfx” -DpfxFilePwd=”123456” -DcerFile=”/app/etc/product/CFCA_ACS_TEST_OCA31.cer”
- Linux服务器下,执行**/jboss/bin/standalone.sh -DmerCertPath=#商户证书地址.pfx -DpfxparTest=#密码 -DhsCertPath=#汇付证书地址.cer
如:**/jboss/bin/standalone.sh -DpfxFile=”/app/etc/product/888888-NEW.pfx” -DpfxFilePwd=”123456” -DcerFile=”/app/etc/product/CFCA_ACS_TEST_OCA31.cer”
| 接口 | 调用方式 | 访问地址 | 说明 |
|---|---|---|---|
| 快捷支付 APP 版接口 | 页面浏览器提交 | http://ip:port/service-demo/quickPay/pay.json | 请求后跳转快捷支付页面 |
| APP 支付接口 | 后台系统调用 | http://ip:port/service-demo/appPay/pay?pay_type=10 | 请求后返回APP支付参数 |